
Introduction to CFG Piles
The Chinese name of CFG (Cement fly ash gravel) pile is cement fly ash gravel pile. It is a high bonding strength formed by uniformly mixing cement, fly ash, gravel, stone chips sand, and water according to a certain mix ratio. The piles, together with the soil and cushion between the piles, form a composite foundation. It can not only fully utilize the potential of pile materials, but also make full use of the natural foundation bearing capacity, and can use local materials according to local conditions. It has the advantages of high work efficiency, low cost, small post-construction deformation, and fast and stable settlement.
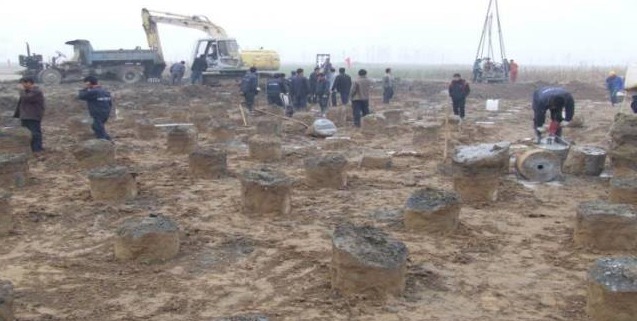
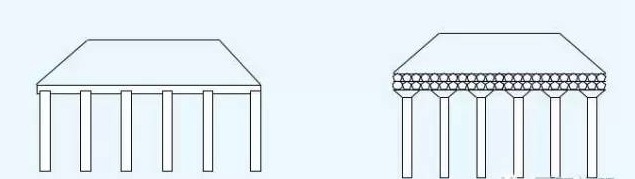
CFG pile foundation treatment consists of a CFG pile body, pile cap (plate), and mattress layer.
Structural type: pile + plate, pile + cap + mattress (this form is used in this bid)
CFG Pile Construction Technology
1. Equipment selection and equipment
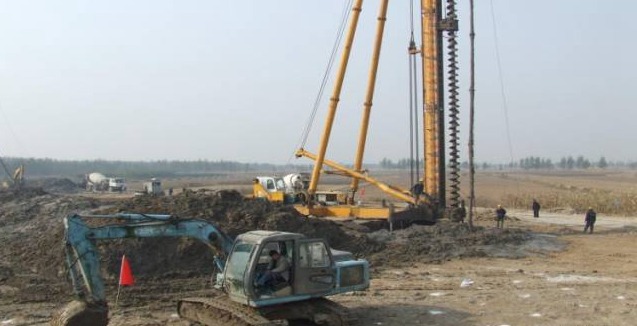
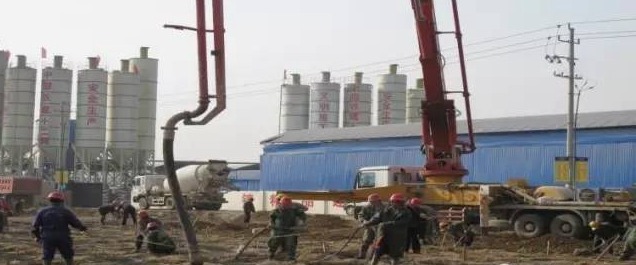
CFG piles can be constructed using a vibrating immersed tube drilling rig or a long auger drilling rig. The specific type and model of piling machinery to be selected depends on the specific conditions of the project. For cohesive soil, silt soil, and silty soil, the vibrating pipe-sinking pile-forming process is used. In areas where there are geological conditions with hard soil layers, using a vibrating pipe-immersing machine for construction will cause greater vibrations to the completed piles, causing the piles to be cracked or broken. For soil with high sensitivity, vibration will cause the structural strength of the soil to be destroyed and the bearing capacity to decrease. An auger drill can be used to pre-lead the hole, and then the vibrating immersed tube pile-forming process can be used. For areas where high-quality hole formation is required, the process of pumping piles into long spiral-drilled pipes is used. This section is designed to be constructed using a long spiral drill rig.
There are also two types of construction machinery for the pump-pressed concrete construction method in long auger pipes: walking type and crawler type, as shown below:
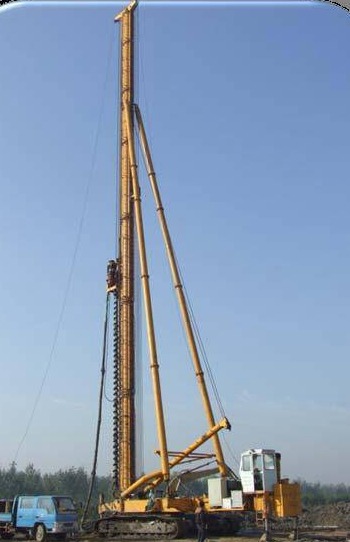
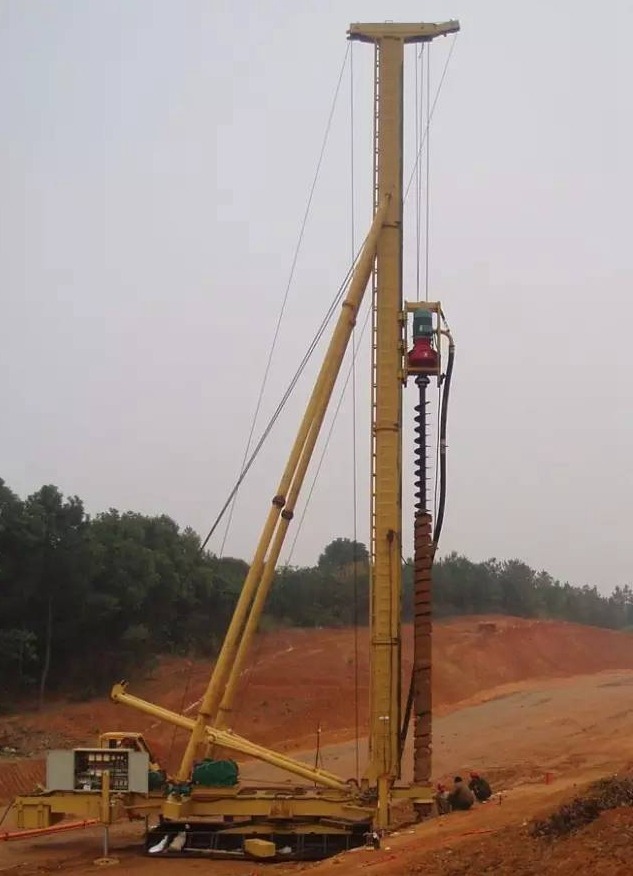
According to the schedule plan and process testing, the equipment configuration is implemented and maintained promptly so that all machinery is in normal condition and meets the needs of the construction without affecting the progress and quality of the construction.
2. Selection of materials and mix ratio
The selected raw materials such as cement, fly ash, gravel, and admixtures should meet the requirements and relevant standards for raw material quality acceptance, and random inspections should be carried out by regulations.
Conduct indoor mix ratio tests according to design requirements and select the appropriate mix ratio.
3. Process flow
3-1 Level the site
Conduct inspection, demolition, and protection of above-ground and underground pipelines in the construction site. Clear the surface vegetation and level the drilling site based on the measured comparison between the original ground elevation and the design pile top elevation. The ground elevation should be 50cm higher than the design pile top elevation. Reserve a drainage slope, make drainage ditches and other measures, and use a road roller. Roll the original ground to K30≥30MPa/m to meet the self-weight and anti-overturning requirements of the long auger drilling rig.
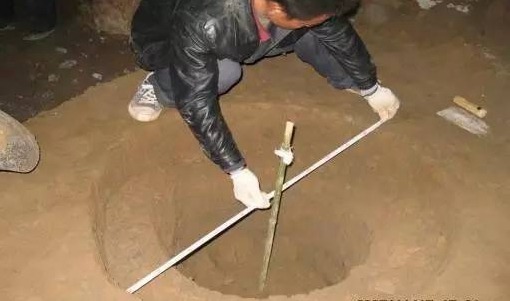
3-2 Construction stakeout
Use a steel drill with a diameter of 8mm to drill a 20cm deep hole vertically into the pile position, pour lime water or lime powder into the hole, and insert a marker into the hole. Disposable wooden or bamboo chopsticks can be used to facilitate the search after the pile position is buried.
3-3 Drilling rigs in place
Drill pipe verticality control: After the drilling rig is in place, the pile driver hangs a two-way vertical ball. By measuring the relative distance between the vertical ball and the upper and lower ends of the drill pipe, the personnel on the sidelines determine whether the verticality deviation of the fuselage meets the specifications or design requirements to ensure that CFG The allowable deviation of pile verticality shall not be greater than 1.0%.
Pile position control: Before the construction of each pile, determine whether the pile driver is aligned with the center of the pile by measuring the adjacent longitudinal and transverse pile positions.
Before the construction of each pile, the on-site personnel will check the pile position centering and drill pipe verticality of the pile driver. Drilling can only be started after meeting the requirements.
3-4 drilling
When drilling starts, close the drill bit valve, move the drill pipe downward until the drill bit touches the ground, and start the motor to drill, generally slowly first and then faster, this can not only reduce the shaking of the drill pipe but also check the deviation of the drill hole so that it can be drilled in time. correct. During the hole-making process, if the drill pipe is found to be shaking or difficult to drill, the footage should be slowed down, and the verticality of the drill pipe and pile position should be checked in time. Otherwise, the pile hole may be deflected and displaced, and even the drill pipe and drilling tools may be damaged.
Pile length control: Make clear length markings on the pile machine body. To facilitate nighttime construction control, reflective materials need to be used for marking; the minimum scale of the marking is generally 50cm or 25cm; according to the footage mark on the drilling rig tower, the hole must reach When designing the elevation, stop drilling. Drilling spoil should be transferred to the designated site promptly.
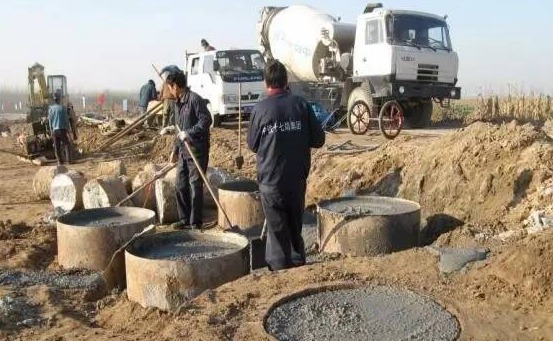
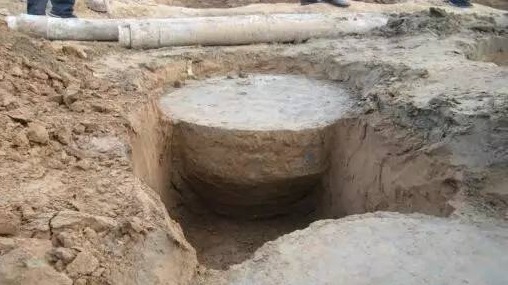
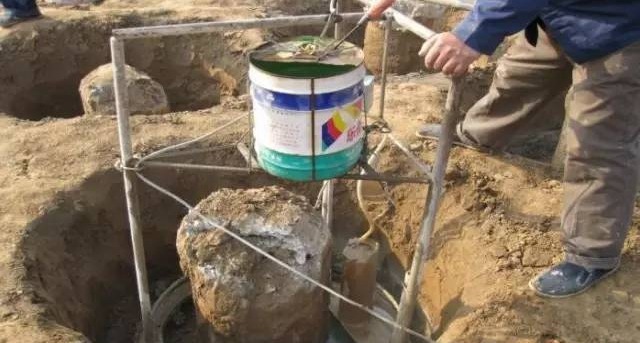
3-5 Pour concrete
The long spiral drilling rig drills to the design elevation stops drilling, and pumps concrete into the drill pipe core tube. When the drill pipe core tube is filled with the mixture, it starts to lift the drill pipe and pressure-grouted the mixture. It pumps while pulling out the pipe. It is strictly prohibited to lift the pipe first and then pump the material. The concrete slump and mixing time should be controlled according to the parameters determined by the technical test, and the mixing time should not be less than 1 minute. When pumping concrete, it is strictly forbidden to pull out the pipe first and then pump concrete (especially end-bearing piles). The drill pipe must stop rotating when pulling out the pipe. The pullout rate should be controlled according to the parameters determined by the test pile. The pullout speed should be uniform and the geological penetration should be relatively long. For hard sections, use low-speed and slow drilling, for soft strata, use fast drilling to reduce the hole expansion coefficient; concrete pumping must also be continuous. If the concrete is not supplied in time, the drilling rig and other materials will be damaged. If the concrete is not supplied in time, the pile may be broken or the drill may be held for a long time, especially in the saturated sand and silt layers. Concrete should be poured to 50cm above the designed CFG pile top elevation, and concrete pumping should be stopped. The amount of concrete poured shall not be less than the designed pile length plus the volume of the super-grouted pile head.
3-6 Drilling rig shifting
Depending on the specific conditions of the drilling rig, generally 4 or 5 holes are drilled and the drilling rig is moved once. Regardless of the size of the pile spacing, it is not advisable to move from the surroundings to the inside of the circle to promote construction, because this limits the outward lateral deformation of the soil between the piles, which can easily cause large-area uplift of the soil and the possibility of pile breakage. Instead, the method can be used to move from the center to the center. A plan that advances outward or from one side to the other. When a weak layer appears underground and hole channeling occurs, the drilling rig should use hole-hopping operations, and then drill adjacent pile positions after the mixture at the adjacent position has solidified.
3-7 Remove drilling mud
Drilling mud must be removed at any time during the drilling process, and the remaining drilling mud must be removed after the drilling rig is moved. It should be noted:
① Except 50 small excavators, no mechanical equipment is allowed to enter the CFG pile drilling and grouting site.
② During excavation, the original soil between piles below the designed pile top elevation shall not be disturbed.
③ Do not dig the CFG pile that has been poured to cause damage to the pile head.
3-8 natural maintenance
CFG piles are buried below the ground, and the tops of the piles are capped with wet clay, so no special maintenance is required. After the pile pouring is completed, the soil between the piles can be excavated and cleaned only after the mixture is 14 days old. During the natural curing period, the borehole pouring site must be protected, and no machinery is allowed to enter the borehole pouring area.
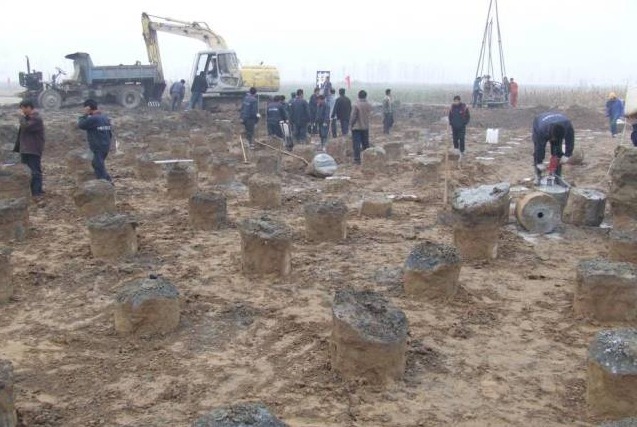
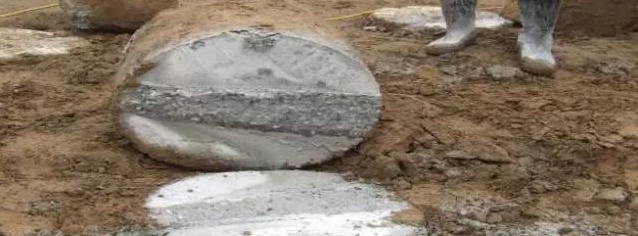
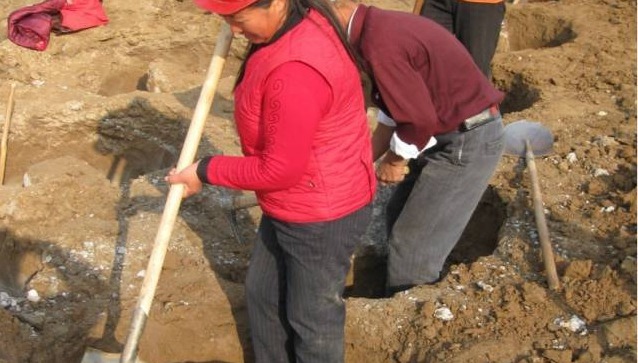
3-9 Cutting off pile heads and excavating soil between piles
When excavating the soil between piles, the excavator is likely to collide with the pile heads and cause shallow pile breakage. During the construction, a plan of cutting the pile heads twice was adopted to avoid artificial damage to the pile heads: first, after the CFG pile pouring is completed and before the concrete solidifies, the wet To cut piles, use a small excavator to clean out the pile head concrete and drilling mud together, leaving 30~50cm uncut. After the strength reaches 80%, use a small excavator (bucket width 0.6m) to excavate the soil between the piles. Use the modified Use a cutting machine to cut to reduce damage to the pile body. After the cutting is completed, the cross-section will be smooth.
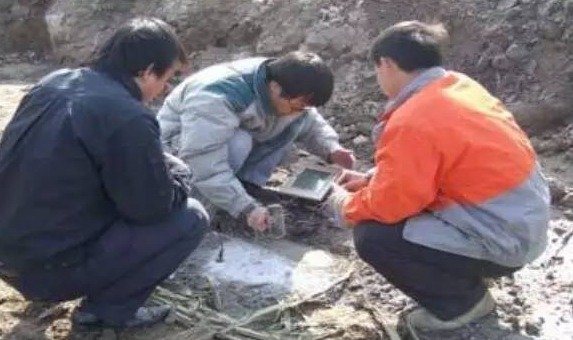
3-10 Detection of piles
3.10.1 Pile integrity inspection
The integrity of the CFG pile body is tested using low-strain dynamic tests. The integrity of the pile body is determined based on the test results.
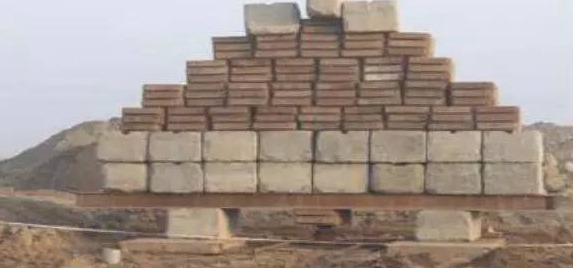
3.10.2 CFG pile mixture strength
Each shift produces one set of standard cubic specimens of the mixture. After 28 days of standard curing, the compressive strength of the specimens is tested. Determine its quality based on the test results.
3.10.3 Static load test of CFG pile composite foundation
Carry out single pile and composite foundation load tests respectively to calculate settlement and bearing capacity. Inspection quantity: 0.2% of the number of piles, and not less than 3
CFG Pile Quality Control Measures
1. The construction is carried out strictly following the designed mix ratio. A group of concrete specimens is randomly selected from each drilling rig and each shift, and the compressive strength is used as the criterion for determining the strength of the mixture;
2. After the drilling rig enters the site, first use a steel ruler to check the diameter of the drill pipe. The diameter of the drill pipe is not less than the designed pile diameter. The height of the main tower of the drilling rig is about 5m greater than the pile length;
3. Before drilling starts, release the control pile positions and provide technical explanations to the drilling rig personnel. The drilling rig personnel will use a steel ruler to release each pile position based on the control pile positions.
4. Before starting drilling, according to the designed pile length of the pile foundation and the thickness of the pile head protective layer, make an obvious mark on the position of the main tower of the drilling rig as a basis for controlling the drilling depth of the drilling rig.
5. After the drilling rig is in place, the commander directs the drilling rig to adjust its position, and uses the two-directional vertical markers hanging on the frame to determine that the verticality of the drilling rig meets the requirements;
6. When starting the construction of CFG piles, we were worried that the construction of piles one by one would cause string holes, so we used the construction method of skip driving with piles separated. However, when skip driving with piles separated, it is easy to squeeze the piles that have been constructed when the pile driver is in place for the second time. For pressure damage, jump driving and pile-by-pile driving should be selected according to different geological conditions.
7. When the CFG pile is poured with concrete, the pressure of the concrete in the upper 1-3 meters becomes smaller, and there are fine air bubbles in the concrete that cannot be discharged. However, the main stressed part of the CFG pile is in the upper part, so the upper pile body is not dense. It is very easy to cause pile damage during the use of the project. The solution is to use a vibrator rod to vibrate the upper concrete after the construction is completed and before the concrete solidifies to strengthen the compactness of the concrete; the second is to strengthen the slump control of the concrete. Too small a slump can easily cause honeycombing.
8. Control of extubation rate
Too fast a pipe extubation rate will result in a smaller pile diameter or reduced pile diameter, while too slow a pipe extubation rate will cause uneven cement slurry distribution, excessive floating slurry on the top of the pile, insufficient pile body strength, and mixture segregation. phenomenon, resulting in insufficient strength of the pile body. Therefore, during construction, the extubation rate should be strictly controlled. It is generally appropriate to control the extubation speed at 2 to 2.5m/min. The extubation speed here is the linear speed, not the average speed. If there is silt or silty soil, the extubation speed must be controlled. Slow down the speed appropriately. Reverse insertion is not allowed during the extubation process.
9. Cause analysis and treatment of broken piles
Broken piles refer to the fact that after the CFG pile is completed, the concrete surface of the pile body is discontinuous and there are cracks or gaps in the middle that are perpendicular to the central axis of the pile. Pile breakage is the biggest quality accident of CFG piles. There are many reasons for broken piles, the main ones are:
1) The construction protection is not enough, and large engineering machinery operates in the CFG pile area where the strength has not yet reached, causing the pile to be broken or the pile head to be crushed;
2) The exhaust valve of the long auger drill is blocked;
3) When pouring concrete, the concrete supply is not timely;
4) Geological reasons, rich groundwater, prone to broken piles;
5) The coordination between pipe extrusion and concrete pumping is not harmonious;
6) The pile head was damaged due to improper operation when cutting off the pile head.

10. Methods to prevent pile breakage
1) For broken piles caused by insufficient construction protection, the most effective method is to strengthen the protection of the area where CFG piles have been poured, use steel pipes or other stronger materials to enclose the area, and strictly prohibit the entry of all large machinery.
2) As for the solution to broken piles caused by improper exhaust valve setting, the exhaust valve position is generally set well when the drilling rig leaves the factory and does not need to be improved. Only a very small number of drilling rigs have this problem, so check it frequently. Exhaust valve and remove the concrete surrounding the exhaust valve.
3) Piles are broken due to an untimely supply of concrete. Strengthening concrete scheduling, timely supply of concrete for CFG piles, and ensuring continuous supply of concrete can prevent piles from being broken due to untimely concrete supply.
4) It is difficult to control broken piles caused by geological reasons during construction. The adaptability of CFG pile treatment should be demonstrated for geological conditions with convection plasticity and abundant groundwater.
5) For broken piles caused by disharmony between pipe extrusion and concrete pumping, tacit cooperation between operators should be sought.
6) In the case of human damage when cutting off the pile head, training the workers and improving their operating skills can avoid this situation.
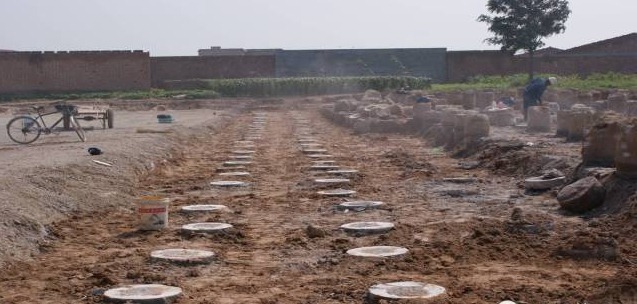
Pile cap construction technology
1, pile cap form
Construction technology of various pile cap forms
Construction Method of Cast-in-Situ Pile Caps with Rotary Cut Piles in Soil Form
Process characteristics
1. The process is simple, efficient and fast.
The soil molding method of first mechanical filling and then manual excavation eliminates the need for excavation and backfilling of soil between piles after the CFG piles are formed, simplifying the operation process and increasing the construction speed; using a self-developed rotary cutting pile cutter to cut the piles. Removing pile heads reduces the labor intensity of workers and greatly improves work efficiency.
2. Easy operation, small disturbance, and good quality.
The soil modeling method can avoid excessive disturbance of the soil between the piles below the design plane of the pile top due to the removal of the protective soil layer and pile head removal operations and solves the problem of broken piles and low-quality backfilling of soil between piles caused by mechanical excavation operations that collide with the pile body. question. The rotary cutting pile cutting mechanism is novel in idea and can operate flexibly in a small soil mold space. It can solve the problem that ordinary pile-cutting machines cannot work in the soil mold while using pneumatic picks to remove pile heads is time-consuming and labor-intensive, has a poor look and feel, and is easy to damage the piles. body issues.
3. Advanced technology, convenient construction, and easy promotion. The construction techniques of site hardening and filling, pile cap soil mold excavation, and pile cutting machine rotary cutting and pile cutting are easy to master, and the configuration of construction organization elements is easy to implement, which is conducive to promotion.
4. Exquisite equipment, low cost, and significant benefits. The self-developed pile-cutting machine is exquisite in structure, simple in structure, easy to purchase accessories, and cheap to produce. It can be processed by itself, effectively reducing equipment cost investment, and has significant social and economic benefits.
Scope of application
This construction method is suitable for the construction of CFG pile composite foundation pile cap net (cylindrical pile cap) structures in railway, highway, housing construction, municipal, and other projects, especially for projects with large CFG pile cap net construction volume, concentrated tasks, and tight construction period. There are significant technical and economic benefits. For truncated cone-shaped and square-cylindrical pile cap net structures, this construction method still has good applicability if the rotary cutting pile cutter has working space conditions.
Process principle
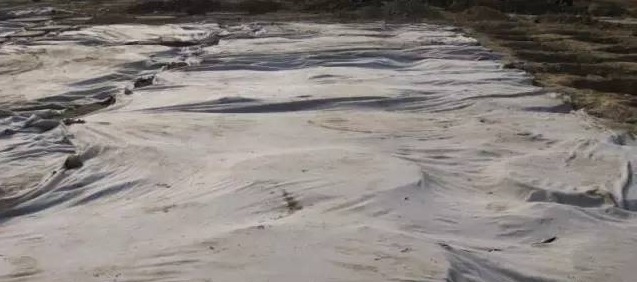
Different from the complexity of the previous construction of the CFG pile cap net structure, which required digging out the soil around the piles after the piles were established, casting the pile caps, and backfilling the soil between the piles after removing the formwork. In the working area, the filling construction of Groups A and B is carried out to form a hardened layer, so that it can meet the backfill compaction quality requirements of the soil between the piles before entering the site for the construction of CFG piles. After the CFG piles are built, the replacement soil is removed and the site is leveled. The foundation trench is manually excavated in the hardened layer according to the size of the pile cap to make a soil mold. A homemade rotary cutting pile cutting machine is used in the soil mold to penetrate the saw blade below the ground. The pile-cutting position is rotated horizontally to cut the pile body, remove the pile head, and then cast the pile cap concrete in place.
Key points of construction operations
1. Site-hardened layer pretreatment
After the table cleaning operation is completed, the working area is pre-filled with Groups A and B fillers before CFG pile construction. The thickness of the hardened layer is the same as the height of the pile cap. The top elevation of the layer is controlled according to the design elevation of the top of the pile cap. The layer thickness and The compaction quality should meet the compaction requirements of the embankment fill below the bed of the passenger dedicated line railway, and at the same time meet the design requirements of the backfill quality of soil between the piles of the CFG pile cap net structure, ensuring that the CFG pile machine can easily enter and move around.
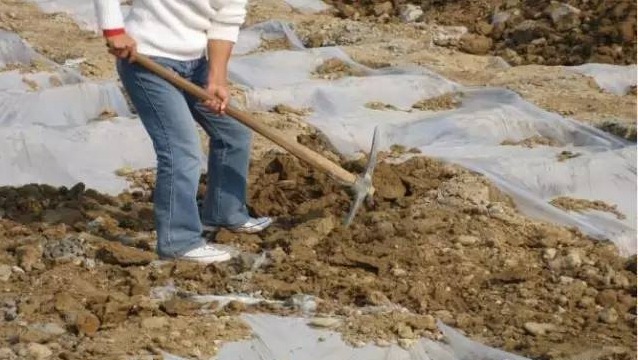
2. Excavate the hardened layer to make a soil model
After the construction of CFG piles is completed, before excavating the pile cap foundation trench, the pile top elevation of each pile is first measured. The technicians determine the digging depth based on the measurement results and the design elevation and brief the construction team. The foundation trench is excavated manually, and the soil around the piles should be excavated strictly by the designed pile cap size and bottom excavation depth to ensure that the center position deviation of the pile cap foundation pit does not exceed 15 mm, and the plane size deviation is less than ±30 mm. The height deviation of the pile cap should not exceed +30 and -20mm. The bottom of the foundation trench at the center should be flat and free of debris. The elevation should be 10cm below the pile-cutting position (the CFG pile body is designed to be embedded in the pile cap 10cm) to facilitate the pile-cutting machine. The track is smooth when rotating and cutting around the pile body.
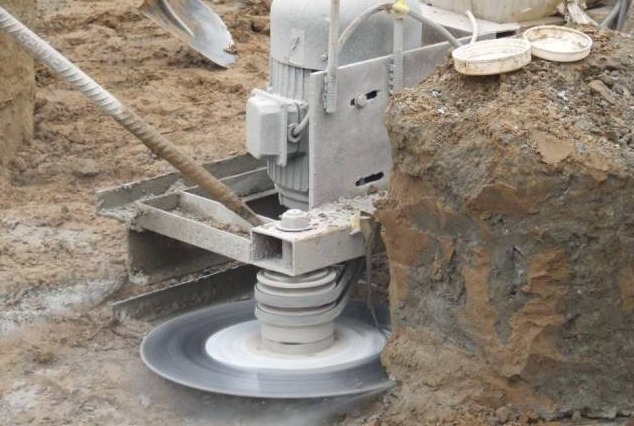
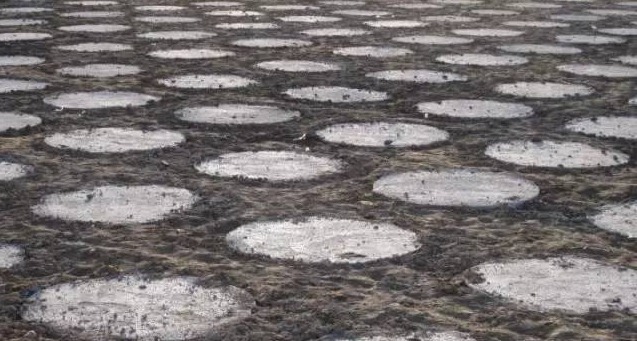
3. Pile head removal operation
After the pile-cutting machine performs a rotation around the pile body, a steel wedge needs to be placed at the cut seam, and a sledgehammer is used to hammer the steel wedge so that the wedge head is embedded in the pile body from the cut seam to pry off the pile body, and the pile head will naturally fall off; cutting The line is located below the ground, and the soil between adjacent piles needs to be excavated to facilitate workers to hammer the steel wedge; to facilitate the positioning of the steel wedge, φ8 steel bars can be welded to the steel wedge as a support bar, which is controlled by another worker, to prevent the steel wedge from deflecting when hammering the steel wedge; pay attention to the safety of electricity when moving the machine on site, and adjust the direction and position of the pile cutter’s power line promptly; set up two work teams for flow operations, and one team is responsible for rotary cutting and sawing piles. One team is responsible for cutting the pile heads. After cutting one pile, the rotary pile-cutting machine can move to the next pile position to continue cutting the piles. The other team starts cutting the pile heads on the cut pile body.
4. Concrete pouring
After the cutting of the pile head is completed, a test is carried out. After passing the test, the floating soil and scum in the soil mold will be cleaned. After passing the inspection and acceptance by the supervisor, it will be poured. Pumped concrete will be used for pouring.
5. Level, compact, and fill the soil between piles
After the pile cap concrete reaches the design strength, remove the pit formwork. Due to the hardening elevation control of the site and the slight damage to the site during the construction process, the soil between the piles cannot be completely flush with the pile cap tops, and there is a certain deviation from the pile cap top elevation. For the soil between piles that is higher than the top of the pile cap, it can be manually removed to the elevation of the top of the pile cap; for the soil that is lower than the elevation of the top of the pile cap, the soil between the piles should be backfilled according to the design filling requirements. According to the conditions at the construction site, the height difference between the soil between the piles and the top of the pile caps is generally 0~15cm. After the pile cap concrete reaches the design strength, dump trucks will be used to transport the filler to the site and be paved manually. Use an impact rammer to perform backfilling and compaction, and backfill in order from the edge to the center. When backfilling, attention should be paid to detecting and controlling the moisture content of the filler to ensure that the compacted quality of the filler meets the design standards. For the parts close to the edge of the pile cap, to avoid problems such as missing corners caused by the collision of the rammer, the filler should be overfilled 5cm above the top of the pile cap and cover the edge of the pile cap before tamping to ensure that the tamping is in place. Finally, the overfilled portion is manually cleared.
Control Measures During Construction Preparation Period
1. Before construction, based on investigation, the material inspection of the planned replacement fillers, cement, fly ash, coarse and fine aggregates, geogrids, and other materials of Groups A and B must be carried out, and a material inspection report must be issued; The specifications require that materials with certificates must obtain certificates. A-control and A-supply materials shall be determined by bidding, and unqualified materials shall not be used. Mix proportion testing and selection shall be carried out for concrete construction, and construction shall be carried out strictly by the selected mix proportions.
2. Inspect and accept the incoming molds, machinery, and other machinery and equipment to ensure that their technical indicators meet standards, operate normally, and meet construction requirements.
3. When constructing CFG piles, strictly follow the determined process parameters such as pile driver type, mixture ratio, protection pile length, final hole conditions, and extubation speed.
4. After the CFG pile mixture is poured, the replacement soil and floating slurry are excavated when the mixture initially set. When removing the replacement soil, care should be taken not to damage the hardened layer and the soil layer below to avoid damage to the pile body. If necessary, reserve a portion of the replacement soil for removal with a small excavator.
5. Before excavation of the pile cap, the pile top should be staked out to determine the excavation outline and depth. A level can also be used for elevation control during the excavation process. The bottom of the soil mold pit should be flat to facilitate the pile-cutting machine to make a smooth cut when cutting the pile head. After the pile-cutting operation is completed, the bottom of the pit should be cleaned to ensure that there is no scum, etc.
6. Strictly control the elevation of the pit bottom for soil mold excavation, and use the 10cm height difference between the saw blade of the pile cutting machine and the bottom of the machine to ensure the accurate position of the pile cutting. When performing cutting operations, the saw blade must be completely cut into the pile body to ensure the depth of the cut to ensure the quality of pile cutting. Three-point cutting and other operations that do not cut around the pile body are strictly prohibited.
7. When pouring concrete, the mix ratio should be selected according to the method of pouring into the mold, and the mixing station should be mixed centrally to ensure quality. During the process from mixing to pouring of concrete, inspections and tests on raw material weighing deviation, sand and gravel moisture content measurement, slump, air content in the mold, etc. must be carried out by the specifications to ensure the quality of pouring. During winter construction, heat preservation measures must be taken to ensure that the temperature of the concrete entering the mold meets the specification requirements.
8. After the concrete pouring of the pile cap is completed, the surface shall be manually plastered and polished. In winter, it is covered with insulation materials for health maintenance, and in summer, it is covered with watering for health maintenance. The curing time of concrete should be determined according to specifications based on concrete materials, temperature, air humidity, and other conditions.
Thank You!
