
What is Drilled (Bored) Pile Foundation?
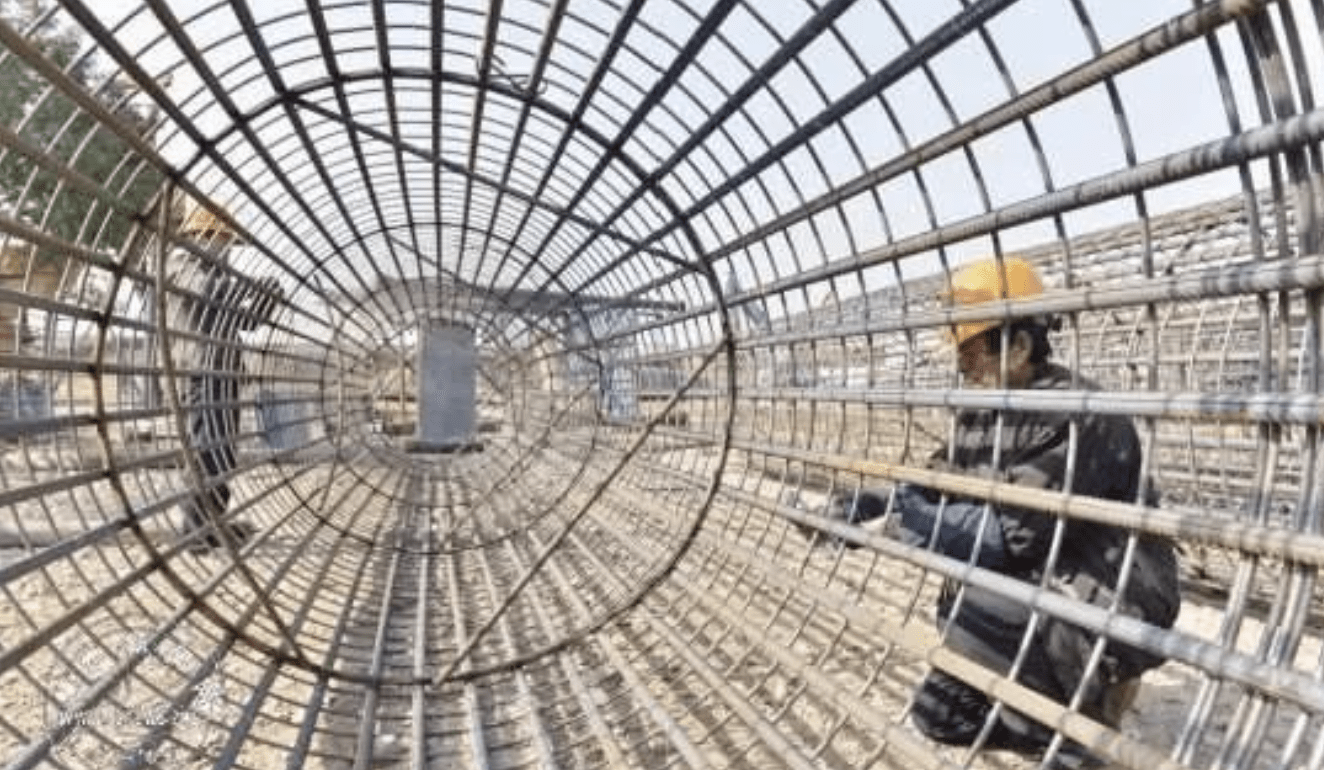
Drilled (bored) pile foundation is a construction technique that involves forming a borehole in the ground at the designated location using various drilling or excavation methods. Once the desired depth is reached, a reinforcement cage is placed inside the borehole, followed by concrete pouring (underwater concrete if there is water in the borehole) to form a pile foundation.
Advantages:
-
Mechanized operation – Allows for all-weather construction with simple procedures.
-
Material flexibility – Construction materials can be processed on-site based on conditions.
-
Fast construction speed – Mature and efficient construction technology.
Disadvantages:
-
Quality control challenges – Being a concealed construction process, ensuring quality is difficult.
-
Environmental concerns – Generates large amounts of slurry and waste soil, requiring proper disposal.
Common Types of Drilled (Bored) Piles
Several drilling methods are used in pile foundation construction, each suitable for different soil conditions:
-
Auger drilling
-
Direct circulation rotary drilling & reverse circulation rotary drilling
-
Submersible drilling
-
Grab drilling
-
Percussion drilling
-
Drilling bucket (mechanical push drilling)
-
Manual excavation
Each method has specific advantages and limitations depending on soil type. This article focuses on auger drilling and direct circulation rotary drilling procedures.
Construction Procedures
1. Auger Drilled Pile Construction Steps
a) Drilling Rig Positioning
-
The rig must be stabilized to prevent tilting or displacement.
-
A depth control scale should be marked on the rig for accurate measurement.
b) Drilling
-
Align the rig mast and position it over the pile location.
-
Begin drilling and soil removal until reaching the target depth.
-
Record the depth measurement after lifting the drill.
c) Borehole Quality Inspection
-
Lower a light into the hole to check for collapses, swelling, or loose soil at the bottom.
-
Loose soil thickness should not exceed 10 cm.
d) Covering the Borehole
-
After inspection, cover the hole with a protective cap for safety.
e) Bottom Soil Cleaning
-
After reaching the target depth, clean the hole by rotating the drill without advancing.
-
Remove excess loose soil if it exceeds standards.
f) Reinforcement Cage Installation
-
Install concrete spacers (or plastic supports) on the cage before lowering.
-
Align the cage vertically and lower it slowly to avoid hitting the borehole walls.
-
For multi-section cages, use double-sided welding for secure connections.
g) Concrete Pouring
-
Use a tremie pipe for concrete placement.
-
Check the loose soil thickness again before pouring.
-
Pour continuously in layers (≤ 1.5 m per layer) with a slump of 8–10 cm.
h) Quality Standards
-
Ensure compliance with design and construction specifications.
2. Direct Circulation Rotary Drilled Pile Construction Steps
a) Surveying & Marking
-
Use a total station to mark pile centers accurately.
-
Set reference stakes for cross-checking during construction.
b) Casing Installation
-
Use a 4 mm steel casing with a diameter 100–150 mm larger than the drill bit.
-
The casing should extend 10–30 cm above ground level.
-
Backfill and compact with clay around the casing.
c) Drilling Rig Positioning
-
Align the rig precisely over the pile center.
d) Mud Preparation
-
Use self-generated slurry for drilling.
-
Begin with low-speed drilling to create a mud layer, then proceed normally.
-
Monitor mud properties (viscosity, sand content) at least 3 times per shift.
e) Drilling
-
Use a three-wing drag bit for rotary drilling.
-
Key considerations during drilling:
-
Check drill verticality every 3 m.
-
Adjust mud properties as needed.
-
Record geological conditions encountered.
-
Avoid rig vibrations or displacement.
-
f) Hole Cleaning (Primary & Secondary)
-
After reaching depth, lift the drill 50 cm and flush the hole.
-
Before concreting, ensure:
-
Mud density: 1.03–1.10
-
Sand content: < 2%
-
Viscosity: 17–20 Pa·s
-
Sediment thickness: ≤ 0.2 m
-
g) Reinforcement Cage Fabrication & Installation
-
Fabricate cages per design, using double-sided welding for splices.
-
Install spacers to maintain concrete cover.
-
Use a crane to lower the cage vertically without touching the borehole walls.
-
Secure the cage to prevent floating during concreting.
h) Tremie Pipe Installation
-
Use 250 mm steel pipes with threaded connections.
-
Conduct a water pressure test (0.6–1.0 MPa) before use.
i) Concrete Pouring
-
Perform secondary hole cleaning before pouring.
-
Ensure continuous concrete supply to prevent cold joints.
-
Key steps:
-
The initial pour volume must cover ≥ 1.0 m of the tremie pipe.
-
Maintain ≥ 2.0 m pipe embedment during pouring.
-
Slow pouring when concrete reaches 1 m above the cage bottom.
-
Resume normal speed after clearing the cage by 4 m.
-
Overfill the pile top by 50–100 cm to ensure quality.
Conclusion
Drilled pile foundations are versatile and efficient but require strict quality control. Proper drilling, cleaning, and concreting procedures ensure structural integrity. Adhering to these methods enhances construction efficiency while meeting environmental and safety standards.
-
