
How to Prevent and Control Bored Piles from Deflecting?
1. Quality problems and phenomena
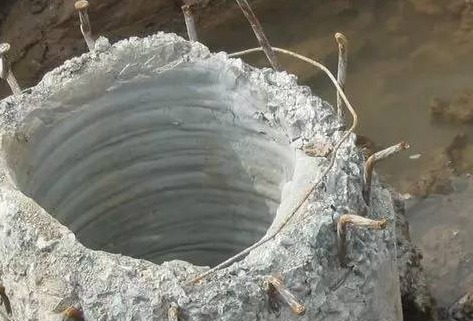
1) The hole is not vertical after being formed, and the deviation value is greater than the specified L/100.
2) The steel cage cannot enter the hole smoothly.
2. Cause analysis
1) The drilling rig is not in a horizontal position, or the construction site is not leveled and compacted, causing uneven settlement during the drilling process.
2) The foundation of the water drilling platform is unstable and not horizontal. During the drilling process, the drilling rig frame undergoes uneven deformation.
3) The drill pipe is bent and the joints are loose, causing the drill bit to shake in a large range.
4) When drilling near an old building, you encounter an obstacle and squeeze the drill bit to one side.
5) The soil layer is uneven in softness and hardness, causing uneven stress on the drill bit, or encountering boulders, probe stones, etc.
3. Preventive measures
1) Before the drilling rig is in place, the construction site should be leveled and compacted, and the drilling rig should be adjusted to a horizontal state. During the drilling process, frequent inspections should be made to ensure that the drilling rig is always working in a horizontal state. The water drilling rig platform must be installed and accepted before the drilling rig is put in place. The platform must be solid and level, and the drilling rig frame must be stable.
2) The lifting pulley groove on the top of the drilling rig, the drill pipe chuck, and the center of the casing pile position should be on the same vertical line, and the drilling rig should be prevented from shifting or excessive swing during the drilling process.
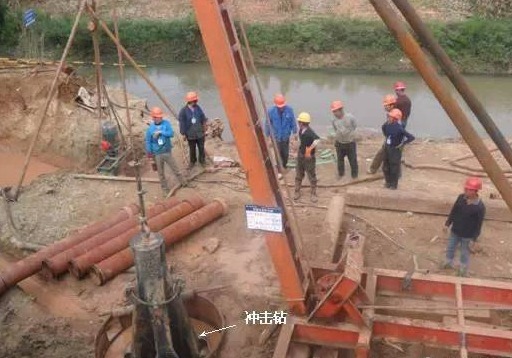
3) When constructing near old buildings, detection should be done in advance. If obstacles are found during the detection process, impact drills should be used for construction.
4) The drill pipe should be inspected frequently, and bent drill pipes should be adjusted or discarded in time.
5) When using an impact drill, the stroke should not be too large, and try to use secondary drilling to ensure the straightness of the hole.
4. Treatment measures
1) When encountering obstacles such as boulders, impact drills can be used to drill holes.
2) When the deflection of the borehole exceeds the limit, the clay should be backfilled and the borehole should be re-drilled after the sedimentation is dense.
What Should I Do if Shrinkage Cavities Occur During Drilling?
1. Quality problems and phenomena
When using a hole probe to inspect the hole, the hole probe is blocked when it is lowered to a certain location, and the bottom of the hole cannot be inspected smoothly. The diameter of a certain part of the drilled hole is smaller than the design requirement, or the hole diameter gradually shrinks from a certain part.
2. Cause analysis
1) The geological structure contains a weak layer. When the borehole passes through this layer, the weak layer squeezes into the hole under the action of earth pressure to form shrinkage cavities.
2) The plastic soil layer in the geological structure expands when exposed to water, forming shrinkage cavities.
3) The drill bit wears too fast and is not repaired in time, resulting in shrinkage holes.
3. Preventive measures
1) According to geological drilling data and changes in soil quality during drilling, if weak layers or plastic soil are found, pay attention to scanning holes frequently.
2) Check the drill bit frequently. When wear occurs, repair welding in time. After repairing the drill bit with more wear, expand the hole to the designed pile diameter.
4. Treatment measures
When shrinkage holes occur, a drill bit can be used to scan the holes repeatedly until the designed pile diameter is met.
How to Deal with Hole Collapse During Drilling?
1. Quality problems and phenomena
Collapse of the well wall during the drilling process or after the hole is formed.
2. Cause analysis
1) Due to the low consistency of the mud and poor wall protection effect, water leakage occurs, or the casing is buried shallowly, or the surrounding sealing is not dense, causing water leakage; or the thickness of the clay layer at the bottom of the casing is insufficient, causing water leakage at the bottom of the casing. The mud head is not high enough and the pressure on the hole wall is reduced.
2) The relative density of the mud is too small, causing the pressure of the water head on the hole wall to be small.
3) When drilling in a soft sand layer, the drilling footage is too fast, the mud wall is formed slowly, and water seeps through the wall.
4) The drilling operation was not continuous and the drilling stopped for a long time. The water head in the hole failed to remain 2m above the water level outside the hole or the groundwater level, which reduced the pressure of the water head on the hole wall.
5) Improper operation, collision with the hole wall when lifting the drill bit or lifting the steel cage.
6) There are large-scale equipment operations near the drilling, or there is a temporary access road, which will cause vibration when vehicles pass by.
7) Concrete was not poured in time after cleaning the hole and left for too long.
3. Preventive measures
1) Do not set up temporary access roads near the borehole, and prohibit the operation of large equipment.
2) When burying the casing on land, 1250px thick clay should be filled at the bottom and around the casing. Pay attention to the compaction. The casing should be evenly backfilled to ensure the stability of the casing and prevent groundwater. Penetrate.
3) When vibrating the casing into the water, the casing should be sunk into the mud and impermeable layers according to geological data. The joints between the casings should be sealed to prevent water leakage.
4) According to the geological exploration data provided by the design department, appropriate mud-specific gravity, mud viscosity, and different drilling speeds should be selected according to different geological conditions. For example, when drilling in a sand layer, the mud consistency should be increased, better slurry-making materials should be selected, the viscosity of the mud should be increased to strengthen the wall protection, and the footage speed should be appropriately reduced.
5) When the water level changes greatly during the flood season or in tidal areas, measures such as raising the casing, increasing the water head, or using a siphon should be taken to ensure that the water head pressure is relatively stable.
6) Drilling should be done continuously, and drilling should not be stopped midway unless there are special circumstances.
7) When lifting the drill bit and lowering the steel cage, it should be kept vertical, and try not to hit the hole wall.
8) If the preparation work for pouring is insufficient, do not clear the hole temporarily. Concrete must be poured in time after the hole clearing is qualified.
9) When supplying water, the water pipe must not be directly flushed into the hole wall, and surface water must not accumulate near the hole opening.
What Should I Do if the Drill Bit Gets Stuck During Drilling?
1. Quality problems and phenomena
The drill bit is in the drill hole and cannot continue to operate.
2. Cause analysis
1) Plum blossom holes, probe stones, or shrinkage holes appear in the holes.
2) The drill bit is lowered too hard, or the loose wire rope is too long, causing the drill bit to fall over and get stuck on the wall.
3) The drill bit will be stuck by falling rocks or larger tools when the hole collapses.
4) After shrinkage holes appear, the size of the drill bit after repair welding increases, the impact is too strong, and the punch cone is sucked.
5) When using a percussion drill to drill in clay formations, the stroke is too large or the mud is too thick, and the punch cone is sucked.
3. Preventive measures
1) For stuck drills that can move up and down, you can slightly lift the drill bit up and down, and use a rotating wire rope to rotate the drill bit for easy lifting.
2) Don’t drill too hard.
3) When repairing the drill bit, ensure that the size matches the hole diameter.
4) When using an impact drill for construction, the stroke should not be too large to prevent the cone tip from tipping over and causing the drill to get stuck.
4. Treatment measures
1) When the soil quality is good or the drill is stuck in a stone hole, a small blasting vibration can be used to loosen the drill bit so that the drill bit can be lifted.
2) When the drill bit is stuck, try lifting it, down, left, and right to lift the drill cone.
3) Lift it with a jack or pulley, but pay attention to the firmness of the opening to prevent it from collapsing.
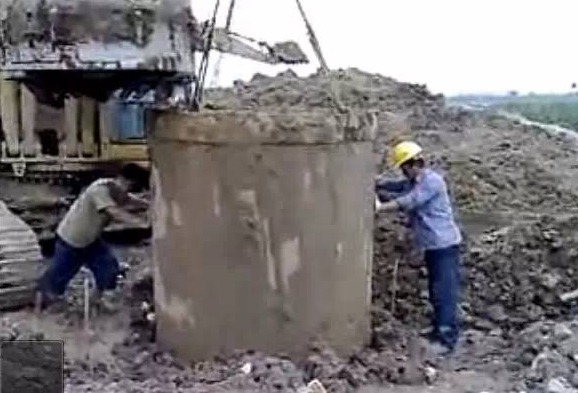
How to Prevent the Hole Wall at the Bottom of the Bored Pile Casing from Collapsing?
1. Quality problems and phenomena
The hole wall collapses; the drill tilts.
2. Cause analysis
1) The bottom and surroundings of the casing are not backfilled with clay or are not compacted enough, and the bottom of the casing is hollowed out during drilling or pouring.
2) Due to the ominous geological drilling data provided, the bottom of the casing is in a silt or sand layer.
3) The diameter of the casing is smaller.
4) Surface water seeps into the filling soil outside the casing, causing the filling soil to become soft.
3. Preventive measures
1) The bottom of the casing should be backfilled with at least 1250px thick clay. When the soil is sandy, the 0.5-1.0m range around the casing should also be backfilled and compacted with clay.
2) According to the geological data provided by the design department, the bottom of the casing should pass through the silt and sand layers.
3) The diameter of the casing should be 20-750px larger than the design hole diameter (forward and reverse circulation drill with drill pipe), 30-1000px (submersible electric drill or impact drill without drill pipe).
4) The slurry outlet hole of the casing should be tamped with clay. At the same time, the slurry should be kept smooth and there should be no accumulation of water around it to avoid soil loss around the casing and cause collapse holes.
4. Treatment measures
1) When the bottom of the casing collapses during drilling in water, the casing should be sunk through the silt layer or sand layer.
2) When the bottom of the casing collapses, the drilling rig should be moved first, then the casing should be pulled out, backfilled with clay as required, and tamped, then the casing again and backfill the clay around the casing and compact it. If necessary, the casing should be lengthened, and then the casing can be re-drilled to the hole.
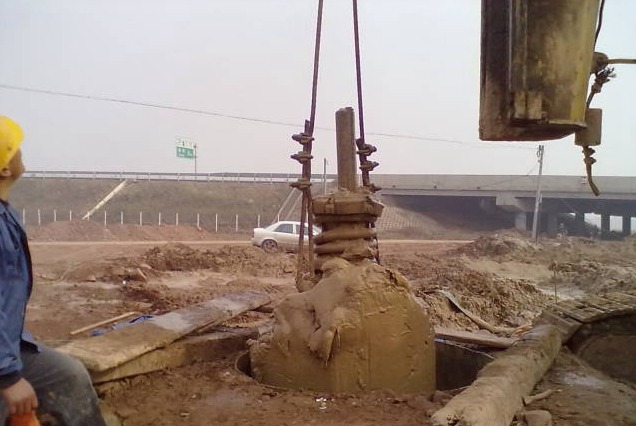
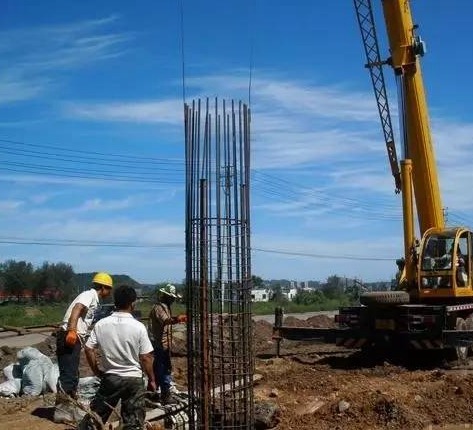
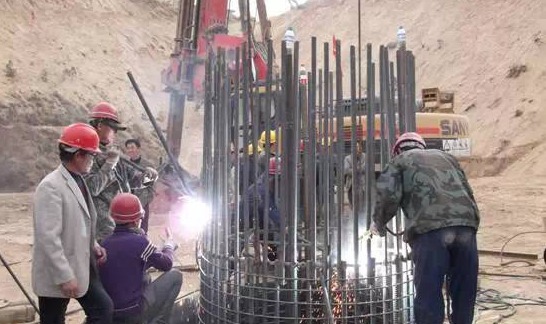
How to Prevent the Steel Cage from Deforming During the Hoisting and Placing Process?
1. Quality problems and phenomena
After lifting, the steel cage undergoes excessive torsion or bending deformation.
2. Cause analysis
1) When the steel cage is long, no temporary fixing rods are added.
2) The hanging point position is wrong.
3) The spacing between stiffening stirrups is large, or the diameter is small and the stiffness is insufficient.
4) There are no reinforcing ribs at the lifting points.
3. Preventive measures
1) Add a stiffening stirrup every 2-2.5m on the steel cage, and stiffeners should be installed at the lifting points. Cross steel bars are added to the reinforcing bars to increase the stiffness of the reinforcing bars to enhance the deformation resistance. When the steel bars are caged into the well, the cross bars are cut off.
2) The steel cage should be drilled into the hole as a whole as much as possible. If the steel cage is too long and cannot be drilled into the hole as a whole, it should be divided into as few sections as possible to reduce the hole entry time. Temporary fixing rods should also be installed for the segmented steel cages, and sufficient supplies should be provided. Welding equipment should be used to shorten the welding time as much as possible; when the two steel cages are docked, the center lines of the upper and lower sections should be consistent. If the hole can be entered as a whole, the temporary fixed rod should be set up as an integral hole on the inside of the steel cage, and the temporary fixed rod should be removed after entering the hole.
3) The position of the lifting point should be selected well. When the steel cage is short, one lifting point can be used, and when the steel cage is long, two lifting points can be used. 4. Treatment measures: If the steel cage is severely twisted and deformed, the steel cage must be disassembled and remade.
After the Steel Frame Is in Place, How to Fix the Steel Frame so That It Does Not Sink or Deviate?
1. Quality problems and phenomena
The steel cage suddenly sank after being put in place; the center of the steel cage was offset.
2. Cause analysis
1) The steel cage is not firmly fixed or the fixing measures are improper.
2) There is an error in the measurement positioning or the conduit collides with the steel cage during the concrete pouring process.
3) During the construction process, no protective measures were taken at the pile position control points, and human movement occurred.
3. Preventive measures
1) After the steel cage is positioned, securely fasten the steel cage to the skid above the casing. Skidding should use 500px×500px×300~10000px rectangular wood roots.
2) The backfill soil around the casing must be compacted to prevent the casing from shifting.
3) The measurement and positioning must be accurate, and control piles must be used for re-measurement and verification. Only after the re-verification is correct can underwater concrete pouring be carried out.
4. Treatment measures
For sunken or eccentric steel cages, before pouring concrete or before pouring into the steel cage, a crane can be used to lift it and reset it.
How to Ensure That the Steel Cage Floats?
1. Quality problems and phenomena
1) The steel cage floats on the poured concrete floor.
2) When lifting the duct, the steel cage floats up.
2. Cause analysis
1) When the poured concrete is close to the bottom of the steel cage, the pouring speed is too fast, and the concrete holds up the steel cage; or the lifting pipe speed is too fast, driving the concrete to rise, causing the steel cage to float.
2) When lifting the conduit, the conduit is hung on the steel cage, and the steel cage rises together with the conduit.
3. Preventive measures
1) When the poured concrete is close to the steel cage, the pouring speed of the concrete should be appropriately slowed down. The normal pouring speed can only be resumed when the bottom of the conduit is raised to at least 2m inside the steel cage. 2) When placing the conduit, the center of the conduit should coincide with the center of the drilling hole as much as possible. Anti-hanging measures should be taken at the conduit joints to prevent the steel cage from being caught when the conduit is lifted, causing the steel cage to float.
4. Treatment measures
1) After the steel cage blocks the conduit, you can try to rotate the conduit to separate it from the steel cage.
2) When the steel cage is found to be floating, pressurize it appropriately to prevent it from continuing to float.
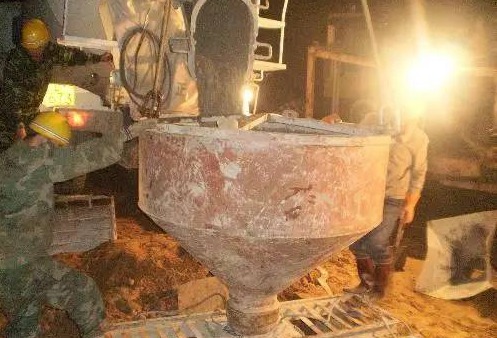
How to Prevent Pile Breakage When Pouring Underwater Concrete?
1. Quality problems and phenomena
1) During the process of pouring concrete, due to the pipe being pulled out, the mud entered the pipe, causing the mud in the hole to suddenly drop rapidly.
2) Due to poor sealing at the conduit joints, mud enters the conduit. If the pouring continues, a mud interlayer will appear in the concrete.
3) The conduit cannot be lifted because the conduit is buried too deep, the processing time is too long when the concrete blocks the conduit, or the long pouring time causes the previously poured concrete to solidify.
4) In the non-damage detection, there is a mud layer in a certain part of the pile.
2. Cause analysis
1) The concrete slump is small, the segregation or the stone particle size is small, the pipe is blocked during the concrete pouring process, and the pipe is not cleared before the initial setting of the concrete, and the pipe has to be lifted, thus forming a broken pile.
2) Due to a calculation error, the distance between the bottom of the conduit and the bottom of the hole is large, so the first batch of poured concrete cannot bury the conduit, resulting in broken piles.
3) When the conduit is lifted, due to measurement or calculation errors, or blind lifting of the conduit, the conduit is lifted excessively, so that the bottom port of the conduit is pulled out of the concrete surface, or the conduit port is placed in the mud layer or the mixed layer of mud and concrete, causing a fracture. pile.
4) When lifting the conduit, the steel cage blocks the conduit and cannot be lifted before the concrete has initially set, causing the concrete pouring to be interrupted and the pile to be broken.
5) Leakage at the conduit interface causes mud to enter the conduit, forming an interlayer in the concrete, and causing the pile to break.
6) The conduit is buried too deep and the conduit cannot be lifted or pulled out, causing the pile to break.
7) Due to other unexpected reasons, the concrete cannot be continuously poured, and the interruption time exceeds the initial setting time of the concrete, resulting in the failure of the pipe to be lifted, resulting in broken piles.
3. Preventive measures
1) Before using the catheter, conduct a leak detection and tensile test on the catheter to prevent leakage of the catheter. Each section of conduit is assembled and numbered, and a review and inspection system must be established after the conduit is installed. The diameter of the conduit should be determined based on the pile diameter and the maximum particle size of the stone, and large-diameter conduits should be used as much as possible.
2) When lowering the conduit, the distance between its bottom opening and the bottom of the hole should not be greater than 40-1250px. At the same time, it must be ensured that the conduit can be buried by at least 1m after the first batch of concrete is poured. In the subsequent filling process, the buried depth of the conduit is generally controlled within the range of 2-4m.
3) The slump of concrete should be controlled at 18-550px, and good workability is required. If the pouring time is long, a retarder can be added to the concrete to prevent the concrete poured in advance from initially setting and blocking the conduit.
4) When making steel cages, butt welding is generally used to ensure a smooth weld. When lap welding is used, ensure that the weld does not form a staggered position within the steel bar to prevent the steel cage from blocking the conduit.
5) When lifting the conduit, carefully calculate the length of the conduit by measuring the depth of concrete filling and the length of the removed conduit. It is strictly forbidden to blindly lift the conduit without measurement and calculation. Generally, only one conduit can be removed at a time.
6) Key equipment must be on standby and sufficient materials must be prepared to ensure continuous pouring of concrete.
7) When concrete blocks the conduit, the conduit can be unplugged and shaken. When the length of the blocked conduit is short, steel can also be inserted into the conduit for impact to clear the conduit or an attached vibrator can be fixed on the conduit for vibration. Clear the concrete in the duct.
8) When the steel cage blocks the conduit, try to rotate the conduit to separate it from the steel cage.
Thank You!
