
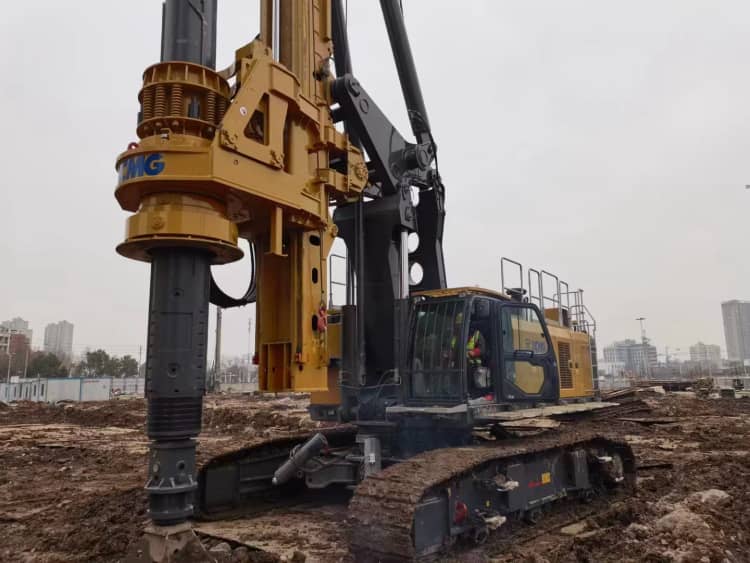
1. Common problems
During the construction process, bored piles are subject to natural conditions such as technology and strata, as well as management conditions such as process arrangement and management process.
The following common problems often occur:
1. Drilling deviation – the verticality of the drilling does not meet the design requirements;
2. Diameter reduction – the local hole diameter within the drilling depth range is smaller than the normal drilling hole diameter or pile diameter;
3. Hole collapse – the hole wall within the drilling depth range is unstable and collapses;
4. Thick sediment – the sediment at the bottom of the pile exceeds the design requirements;
5. Floating steel cage – the cage top elevation of the steel cage continues to rise during the concrete pouring process;
6. Short pile head – the pile head is lower than the design elevation;
7. Broken pile, mud layer – the concrete of the pile body is obviously disconnected or contains mud.
2. Cause analysis and preventive measures
1. Cause analysis and preventive measures for borehole deviation
(1) Cause analysis of borehole deviationDrilling deviation is often caused by the unstable installation of the drilling rig or bending of the drill rod, soft or uneven ground, the steep interface between soft and hard soil layers, or large boulders or other hard objects in the soil layer.
(2) Preventive measures
① Before construction, the site should be compacted and leveled, and the rail sleepers should be evenly grounded. When installing the drilling rig, the center of the turntable and the lifting pulley on the drilling rig should be on the same axis, and the drill rod position deviation should not exceed 20 cm.
② The pile driver components should be properly maintained and assembled, and the verticality and horizontality of the pile frame should be corrected before drilling.
③ If the boulders encountered during drilling are shallow, they can be dug out. If they are deep, core drilling rigs can be used to drill through the rocks and blast them before construction.
④ When drilling in sand and silt layers, the drilling speed should not be too fast.
⑤ If the drill hole is slightly tilted, it can be corrected by reciprocating hole sweeping. If the pile hole is seriously tilted, gravel and clay should be filled into the hole to more than 0.5m from the deviated hole. After eliminating the factors causing the tilted hole, re-drill, slowly lift and lower, and repeatedly sweep the hole to correct it until the pile hole meets the requirements.
2. Analysis of causes of shrinkage and preventive measures
(1) Analysis of causes of shrinkage
① The expansive soil in the soil layer expands when it encounters water, causing the borehole to shrink.
② The drill bit is not welded in time, and the drill becomes smaller and smaller, resulting in shrinkage in the lower part.
③ The quality of the concrete mixture does not meet the requirements, resulting in poor fluidity, small slump, and serious aggregate segregation of the concrete mixture, so that the falling concrete cannot fully replace the retaining mud in the pile hole, or the space that should be filled with cement mortar is filled with retaining mud at the aggregate segregation site, or the hollow is not filled at all, resulting in partial length shrinkage.
④ Improper construction measures. It was found through on-site inspection that neck shrinkage and voids mainly appeared in the upper part of the pile body. This is because the concrete pouring construction of the perforated cast-in-place pile reaches the upper part of the pile body, the self-weight of the concrete is reduced, and it is difficult to compact by self-weight, which makes it easy to form neck shrinkage and voids. Therefore, when the concrete is poured into the upper part of the pile body, effective measures should be taken to reduce the pressure outside the pipe and improve the self-weight compaction of the concrete to avoid neck shrinkage and voids.
⑤ Poor quality of construction workers. Poor quality of construction workers (most of them are untrained workers) and irregular operation are also one of the reasons that cannot be ignored for necking.
(2) Prevention and control measures
① Use high-quality mud to reduce water loss. When drilling holes, increase the pump volume and speed up the drilling speed. After a period of drilling, a mud skin will form on the hole wall, so that the hole wall will not seep water and will not cause expansion. Or weld a certain number of alloy blades on the outside of the guide to play a role in sweeping the hole during drilling or drilling. If the diameter is reduced, use the method of repeatedly sweeping the hole up and down to expand the hole diameter. Pour concrete in time after drilling to prevent the diameter from shrinking due to long parking time.
② Check the drill bit size frequently and replace it in time if it is worn.
③ Strictly control the concrete mix ratio and accurately weigh the materials to ensure the quality of the concrete mixture.
④ Take effective measures to ensure the quality of underwater concrete pouring. When pouring concrete, ensure that the length of the conduit buried in the concrete is not less than 1 m; the concrete supply is timely to ensure continuous pouring of concrete; at the inclined platform of the hole mouth, the slump of the concrete is tested as required (under normal circumstances, it is measured every 15 minutes) and the test blocks are tested for bulk density, compressive strength, impermeability grade, elastic modulus, etc. If abnormalities are found, the cause is immediately identified and adjusted; when the concrete is poured to the upper part of the pile body (about 5 m from the hole mouth), the slurry surface in the hole is lowered to reduce the pressure outside the pipe and increase the impact of the concrete falling in the pipe, which is conducive to the self-weight compaction of the concrete. Even when the concrete in the pipe cannot fall, the conduit can be pulled out, the remaining mud in the hole is emptied, the surface of the poured concrete is chiseled and washed, and then the concrete is poured by manual vibration to ensure the quality of concrete pouring and avoid necking and voids.
⑤ Improve the quality of construction personnel through education and training.
3. Causes of hole collapse and preventive measures
(1) Causes of hole collapse. During drilling, if bubbles are found in the discharged mud or the mud suddenly leaks, it indicates that there are signs of hole wall collapse. The main causes of hole collapse are as follows:
① The mud density is not enough, or the performance index does not meet the requirements, and the hole wall has not formed a solid mud skin;
② The casing is buried too shallowly, and the bottom of the casing leaks, causing the ground near the hole mouth to be soaked in water;
③ The water head height in the hole is not enough, and the hydrostatic pressure is far lower than the soil pressure.
④ The hole cleaning time is too long, or the pause time after hole cleaning is too long.
⑤ The steel cage is tilted during the insertion process, puncturing the mud skin and causing the hole to collapse.
(2) Preventive measures
① Use mud with a large volume and mass, use clay with a high colloid rate to make slurry, or add admixtures;
② The depth of the casing should be appropriately increased according to the soil layer, and clay should be used to fill the surrounding area when burying the casing.
③ Ensure the water head height in the borehole and replenish the mud in time;
④ The waiting time for pouring should generally not be more than 3 hours, and the pouring time of concrete should be controlled. Under the condition of ensuring the construction quality, the pouring time should be shortened as much as possible.
⑤ When the steel cage is suspended, it should be aligned with the hole position, suspended straight and steady, and slowly sunk to avoid collision with the hole wall;
⑥ If the hole mouth collapses, it should be filled with clay soil immediately, the casing should be reburied, and the hole should be reopened. If the hole mouth is large and deep, it should be reinforced with jet grouting piles or mixing piles after filling.
⑦ If the hole collapses, the collapse position should be identified, and a mixture of crushed stone or block stone and clay soil should be backfilled to 1 to 2 meters above the collapsed hole. If the hole collapses seriously, it should be backfilled completely. After the backfill material is deposited and compacted, punching and drilling can be carried out. During the drilling process, rocks should be filled while drilling, and the low hammer should be driven in to squeeze the rocks into the hole wall to build the wall.
⑧ If the hole collapses after the steel cage is placed, the steel cage should be pulled out of the hole immediately, and the hole should be re-drilled, and cleaned, the steel cage should be placed, and concrete should be poured; if the steel cage cannot be pulled out, choose to use a reverse circulation pump to clean the hole and then remove the steel cage.
4. Analysis of the causes of thick sediment and preventive measures
(1) Analysis of the causes of thick sediment
① Failure to clean the hole in time, failure to clean the hole for the second time, or failure to pour concrete in time after the hole is cleaned properly will cause serious sedimentation and accumulation of debris in the mud, resulting in excessive sediment at the pile end.
② The mud has a small specific gravity, a low colloid rate, and poor stability, which affects the hole-cleaning effect. When the mud-specific gravity is less than the sediment specific gravity, it is not conducive to the circulation of the mud to remove the sediment, which will also cause serious sedimentation and accumulation of debris in the mud, resulting in excessive sediment at the pile end.
③ The interval between the end of hole cleaning and the pouring of concrete is too long, and the rock and soil particles sink to the bottom of the hole to form sediment.
④ When the steel cage or conduit is hoisted, it hits the wall and causes the soil to collapse to the bottom of the hole.
⑤ The initial concrete pouring has insufficient impact force, which affects the rise of mud sediment at the bottom of the pile hole.
(2) Preventive measures
① Carefully clean the hole as required, for no less than 30 minutes, and frequently measure the hole depth and mud volume quality, viscosity, and sand content during the hole cleaning process.
② The action of lowering the steel cage and the conduit should be careful and standardized to prevent collision with the wall. If the soil on the hole wall is knocked off, the conduit should be used to clean the hole for the second time.
③ Make all preparations before concrete pouring and shorten the time interval from cleaning the hole to pouring.
④ The distance between the lower end of the conduit and the sediment surface should be controlled at 30-50cm. The initial concrete pouring should be sufficient to ensure that the conduit is buried for more than 1m, to use the huge impact force of the concrete to splash away the sediment at the bottom of the hole, and achieve the purpose of removing the sediment at the bottom of the hole.
⑤ The slump of the concrete should be controlled at 18-22cm. The inner wall of the conduit should be cleaned and rinsed frequently to ensure the downward speed of the initial concrete pouring.
⑥ Use post-grouting technology to reinforce the pile end.
5. Analysis of the causes of steel cage floating and preventive measures
(1) Analysis of the causes of steel cage floating
① The weight of the steel cage is relatively light. When the bottom of the steel cage encounters concrete, the buoyancy of the concrete is greater than the sum of the weight of the steel cage and the friction between the steel cage and the wall, causing the steel cage to float.
② When pouring concrete, since the lower part of the pile is plain concrete, it takes a while to pour it, or the pouring time is not tight, causing the concrete to be about to set but not set, so that the bottom of the steel cage is not easy to enter the concrete when it contacts the concrete, and is pushed out by the rising concrete, causing the cage to float.
③ The workability of the concrete does not meet the design requirements, or the quality is poor.
④ The initial position of the steel cage is too high, the fluidity of the concrete is too small, and the buried depth of the conduit in the concrete is too large, and the steel cage is dragged up by the concrete; when the concrete is poured under the steel cage, if the conduit is lifted at this time, the bottom of the conduit is only about 1m away from the steel cage. Due to the large impact force of the poured concrete flowing out of the conduit, the steel cage is pushed up.
⑤ When the conduit is buried deep, the upper concrete is close to the initial setting due to the long pouring time, and a hard shell is formed on the surface. The concrete and the steel cage have a certain grip force. As the concrete rises from the bottom to the top, it drives the steel cage to move up;
⑥ The conduit hangs on the steel cage and brings the steel cage up when pulling up.
(2) Preventive measures
① Measure the buried pipe depth and remove the pipe in time to ensure that the buried pipe depth is not greater than the relevant specifications;
② Control the concrete pouring speed. When the pile length is less than 50m, the pouring speed should not be greater than 0.5 m3/min;
③ Fix the hanger on the casing to effectively prevent it from floating.
④ Appropriately reduce the number of stirrups at the lower end of the steel cage to reduce the upward support force of the concrete.
⑤ When the steel cage is found to float, the pouring should be stopped immediately, and the buried depth of the conduit and the elevation of the poured concrete should be accurately calculated. The conduit should be lifted before pouring again. The floating phenomenon can be eliminated.
⑥ Lower the conduit to the original depth. During the lifting process, adjust the position and direction of the conduit to separate the conduit from the steel cage.
⑦ Ensure the workability of the poured concrete.
6. Causes and preventive measures for short pile heads
(1) Causes and preventive measures for short pile heads
① The mud is too thick, and the hammer is difficult to determine the mud residue or the concrete surface;
② The hammer is too light and cannot sink to the concrete surface, resulting in mismeasurement, removal of the guide tube, and suspension of pouring, which results in short pile heads.
(2) Preventive measures
① Make a good hammer to ensure that the concrete surface can be measured accurately in real-time;
② When pouring is almost finished, since the concrete at the pile head contains a large amount of sediment and has a high density, it is necessary to add clean water to dilute the mud and pound out some of the sediment.
③ The original pile head can be roughened and connected. The diameter of the connected pile is 100-200mm larger than the original pile diameter, and the strength grade of the connected pile concrete is one grade higher than that of the original pile.
7. Causes and preventive measures for broken piles and mud layers
(1) Causes and preventive measures for broken piles and mud layers
① The guide tube is buried too shallowly. During the pouring process of underwater bored piles, the first poured concrete is mixed with mud residue at the bottom of the hole and is always at the top of the concrete in the hole. When the buried depth of the conduit in the concrete is <1 m, the diffusion of the upper concrete in the borehole is in a state of entrainment, and part of the concrete rises along the borehole wall and mixes with the upper floating slurry; when the buried depth of the conduit is >1m, the concrete surface in the hole is in a vertical rising state, and no mixing of concrete and upper mud is found. During construction, there is too much floating slurry in the hole, and the buried depth of the conduit is too shallow for some reason, which is one of the main reasons for mud in the pile body.
② The bottom of the conduit is lifted off the concrete surface. When the concrete blocks the pipe, to force the concrete in the conduit to fall, the conduit needs to be lifted to a certain height to shake the conduit. If the bottom of the conduit is lifted off the concrete surface, it will become a broken pile; due to the operator’s mistake, the conduit is lifted too hard and the bottom of the conduit is lifted off the concrete surface, resulting in a broken pile; calculation errors will also lift the bottom of the conduit off the concrete surface, resulting in a broken pile.
③ The conduit is blocked, and it is taken out of the hole to clear it, which interrupts the pouring. The joint surface is not properly treated before the subsequent construction, and the mud sediment is not completely removed or floated up and discharged, resulting in broken piles.
④ The initial pouring volume is insufficient, which cannot meet the requirements of the initial burial depth of the conduit required by the specification.
⑤ The initial setting of the initial pouring of concrete. In deep holes and large-diameter cast-in-place piles, a single pile needs to be poured into a large amount of concrete, so the pouring time is long, sometimes exceeding 7 hours, 8 hours, or longer. In this case, the initial setting of the first pouring of concrete must be considered. During the pouring process, the first batch of concrete is mixed with mud and sand at the bottom of the hole, and it always floats on the surface of the concrete. If the pouring time is too long, this part of the concrete may initially set and become a shell. The initially set concrete will hinder the rise of fresh concrete and cause pouring difficulties. If the conduit is moved up and down, the fresh concrete may overflow the initially set concrete to form a new pouring surface. This part of the initially set concrete mixed with mud and sand will be left between the pile bodies, forming a pile body mud defect, and a severe defect will become a broken pile. The hole collapses during pouring. Poor wall protection during hole formation or disturbance by external machinery during the pouring process will cause the hole to collapse, which will cause the collapsed block to be stuck between the steel cage and the hole wall, resulting in mud in the pile body. In severe cases, it will hinder the rise of concrete, making it impossible to pour concrete and causing broken piles.
(2) Prevention and control measures
① Continuously measure the buried depth of the conduit during the pouring process. The “Technical Specifications for Building Pile Foundations” (JGJ94-2008) stipulates: “The depth of the conduit buried in the concrete should be 2 to 6 meters”; the “Technical Specifications for Highway Bridge and Culvert Construction” (JTJ41-2000) stipulates: “During the pouring process, the buried depth of the conduit should be controlled at 2 to 6 meters”; the “Railway Bridge and Culvert Construction Specifications” (TB10203-2002) stipulates: “The depth of the conduit buried in the concrete shall not be less than 1.0m, and should not be greater than 3.0m; when the pile body is long, the depth of the conduit buried in the concrete can be appropriately increased.”
② After each pouring, the inside and outside of the conduit should be cleaned. Before pouring, the condition of the conduit and the workability of the concrete should be checked to ensure that the conduit is not blocked during the pouring process.
③ The volume of the first pouring should meet the requirements of the specification, and necessary adjustments should be made according to the site conditions. The Technical Specifications for Building Pile Foundations (JGJ94-2008) stipulates: “There should be sufficient concrete reserves, and the conduit should be buried no less than 0.8m below the concrete pouring surface at one time.” The volume of the first pouring can be calculated based on this; it can also be calculated according to the formula in the Technical Specifications for Highway Bridge and Culvert Construction (JTJ41-2000). The formula is as follows: The amount of the first batch of poured concrete should be able to meet the needs of the initial burial depth of the conduit (≥1.0m) and fill the bottom of the conduit.
④ The entire concrete pouring process must be continuous, and intermittent pouring is prohibited. If necessary, add an appropriate amount of retarder to the concrete to delay the initial setting time of the concrete. Strictly determine the mix ratio of concrete. The concrete should have good workability and fluidity, and the slump loss should meet the pouring requirements.
⑤ During the pouring process, do not pull the guide tube violently back and forth, and the buried pipe depth must meet the requirements of the specification. If necessary, insert a mud pipe outside the guide tube for circulation to ensure the stability of the hole wall.
(3) The following procedures are generally adopted for the treatment of broken piles:
① Through geological core sampling, investigate the location of broken piles or mud inclusions and judge the strength of concrete.
② In addition to drilling a core hole with a geological drill, another hole should be drilled, one for the slurry inlet hole and the other for the slurry outlet hole. The hole depth reaches at least 1.0m below the broken pile or mud position;
③ Use a high-pressure water pump to press clean water into a hole with a pressure of not less than 0.5-0.7MPa to flush out the mud and loose concrete;
④ Grouting, the first time to press in pure cement slurry with a water-cement ratio of 0.8, the slurry inlet pipe should be inserted into the borehole for more than 1.0m, and the slurry inlet pipe should be blocked with hemp to prevent the cement slurry from bubbling out of the slurry inlet hole. After the original clean water in the hole is pressed out from the slurry outlet, press in concentrated cement slurry with a water-cement ratio of 0.5;
⑤ To fully diffuse the slurry, press for a while and stop for a while. When the concentrated slurry comes out from the slurry outlet, stop grouting, seal the slurry outlet with crushed stone, and plug it with hemp.
⑥ Press in cement slurry with a water-cement ratio of 0.4, and increase the grouting pressure to 0.7-0.8MPa, close the slurry inlet valve, stabilize the pressure, and suffocate for 20-25 minutes, and the grouting work can be completed. After the cement hardens, the core should be drilled again to check the reinforcement effect. The pile connection method is mainly applicable to half-cut piles caused by severe blockage of the conduit, pipe jamming, or other reasons during the pouring process, which forces the pouring to be interrupted but not continued.
The pile connection method should be used according to the groundwater level of the concrete surface of the half-cut pile and the size of the pile diameter.
① When the concrete surface is above the groundwater level, the hole-digging method can be adapted to dig directly to the concrete surface, chisel and clean it, and pour directly to connect the pile to the designed pile top surface. Since the pile connection is a manual method, artificial wall protection should be carried out when encountering unstable strata during excavation.
② When the concrete surface is below the groundwater level, if the section position is not too deep from the hole mouth, the section can be connected to the pile top design elevation by combining hole digging and well point dewatering.
③ When the concrete surface is below the groundwater level, the section position is deep from the hole mouth, and the pile diameter is large, the pile core drilling method can be adopted.
④ If the bearing capacity or settlement requirements cannot be met after treatment, additional piles are required. There are many processes and quality control points in the construction of bored piles, so the construction sequence should be arranged compactly: hole forming, steel cage processing and hanging, secondary hole cleaning, concrete pouring, etc. to ensure the quality of the pile body; strictly control the main process parameters: mud index for hole forming, steel bar processing and main dimensions, primary hole cleaning index, secondary hole cleaning index, concrete pouring process index, etc. Take preventive measures: carefully study the site’s geological conditions, on-site construction conditions, concrete mixing and transportation conditions, etc., and take preventive measures for processes, parts, and soil layers that may have problems. If problems occur, appropriate measures should be taken immediately and handled on time.
===Thanks===
