
Introduction
Bored pile foundation construction is a critical process in modern construction projects. This comprehensive guide outlines the complete step-by-step procedure for bored pile construction, ensuring quality, safety, and compliance with engineering standards. Understanding this process is essential for construction professionals, engineers, and project managers involved in foundation work.
1. Construction Preparation
Before drilling begins, clear the work platform of all debris and properly plan:
-
Positioning and orientation of pile drilling equipment
-
Storage areas for reinforcement cages
-
Crane placement locations
-
Concrete pouring zones
Place wooden sleepers beneath the steel pipes of the pile machine to prevent equipment displacement during operation.
2. Survey and Marking
The surveying team marks the center point of each pile location. Construction crews then establish reference lines with protective stakes, ensuring:
-
Reference points don’t interfere with machinery operation
-
Protective stakes remain undisturbed throughout construction
3. Casing Installation
Key specifications for casing installation:
-
Casing diameter should be 30cm larger than the pile diameter
-
Use crawler cranes with vibration hammers for installation
-
Installation depth determined by site conditions (must penetrate the medium sand layer, reachingthe gravel layer)
-
The casing top should be level with the platform surface
-
Maximum allowable deviation: 5cm from design center point
-
Maximum inclination: 1%
4. Mud Pit Preparation
Utilize adjacent pile casings as mud pits. Prepare drilling fluid using:
-
Bentonite (or high-quality loess)
-
Sodium hydroxide
-
Cement
The drilling fluid is naturally created through the up-and-down impact action of the pile hammer.
5. Measurement Verification
After casing installation:
-
Field technicians measure casing top elevation using leveling instruments
-
Survey team verifies casing centering
6. Installation of Pile Construction Identification Plate
Field technicians calculate the required drilling depth and complete the pile construction identification plate.
7. Pre-Drilling Inspection
Critical checks before drilling commences:
-
Verify impact hammer diameter and weight meet requirements
-
Use plum-blossom-shaped hammers with spherical arc surfaces
-
Hammer diameter should be 80-100mm smaller than the pile diameter
-
-
Confirm proper drilling rig installation
-
Ensure alignment of the lifting pulley front edge, hammer center, and pile center
-
Maximum vertical deviation: 20mm
-
8. Drilling Operations
Drilling protocol:
-
Control the advance rate at the initial stage
-
Use short strokes when drilling through the casing edge to strengthen the wall protection
-
Normal drilling speed may commence after exceeding full hammer height
-
Construction teams must maintain detailed drilling records and retain cuttings samples
-
Field technicians daily inspect:
-
Cuttings consistent with design specifications
-
Potential borehole deviation
-
Hammer diameter measurements
-
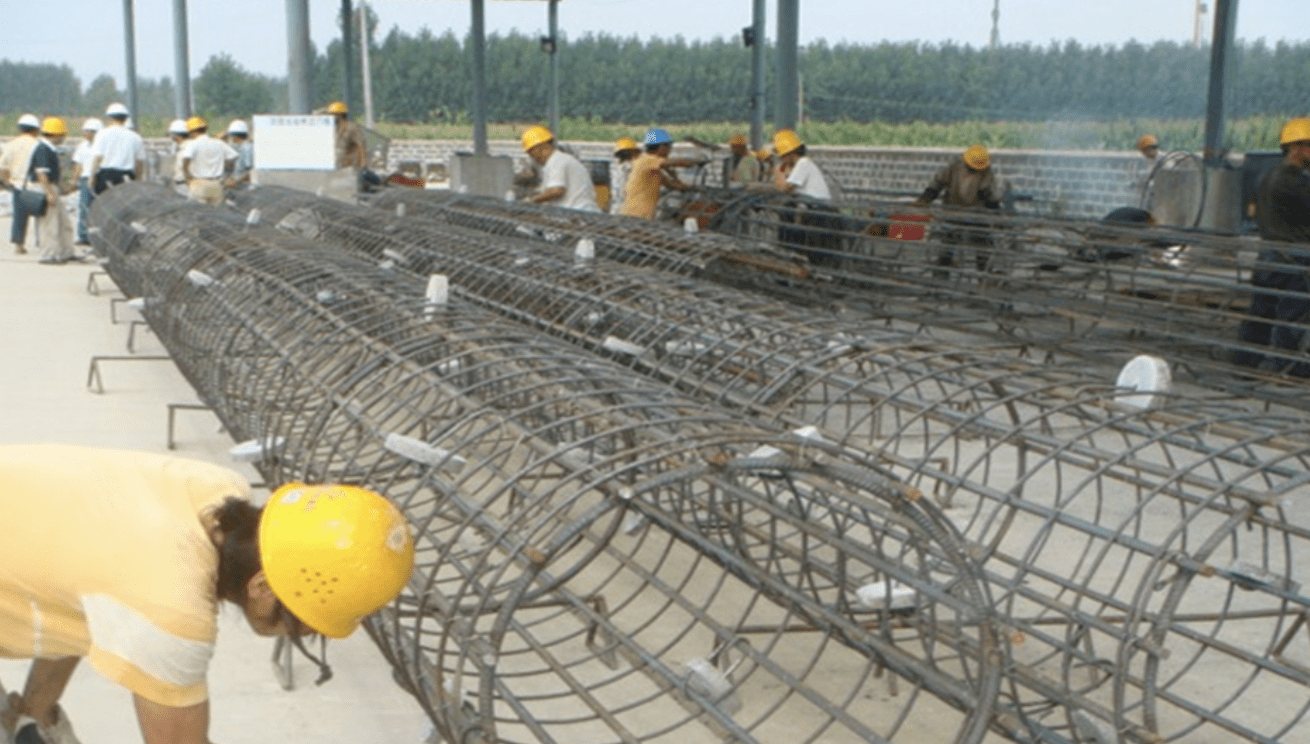
9. Reinforcement Cage Fabrication
Fabricate reinforcement cages in the steel processing yard according to specifications.
10. Borehole Inspection
Post-drilling verification:
-
Technicians recheck casing elevation and verify the achieved pile length
-
Measure hole depth using marked measuring ropes (calibrated with 50m steel tapes)
-
Quality control engineers report to the supervision office for formal inspection
11. Primary Hole Cleaning
After drilling completion:
-
Raise the hammer 30-50cm above the hole bottom
-
Conduct high-volume cleaning until all parameters meet requirements
12. Reinforcement Cage Installation
Procedure:
-
Transport cages from the processing yard to the site
-
Use truck cranes for installation
-
Before installation:
-
Lower hole inspector to verify borehole conditions
-
Only proceed after passing inspection
-
13. Top Positioning of Reinforcement Cage
Critical positioning requirements:
-
Calculate the hanging reinforcement length based on the measured casing elevation
-
Verify calculations before welding hanging reinforcements
-
Maximum allowable deviations:
-
20mm for cage center plane from pile center
±20mm for top elevation
-
14. Conduit Installation and Secondary Cleaning
Concrete pouring specifications:
-
Use 300mm diameter steel conduits
-
Conduct water pressure and joint tensile tests before use
-
Maintain 30-40cm spacing between the hole bottom and the conduit bottom
-
Perform secondary cleaning after conduit installation
-
Verify sediment thickness and mud density before concrete pouring
15. Concrete Pouring
Operation protocol:
-
Coordinate with the mixing station and laboratory for concrete delivery
-
The initial pour volume must ensure ≥1m conduit burial depth
-
During pouring:
-
Maintain 2-6m conduit burial depth
-
Continuously monitor the concrete surface position
-
Adjust conduit depth accordingly
-
-
Pour concrete to 0.5m above the design elevation to ensure pile head quality
Common Construction Issues and Solutions
Issue: Hole Collapse
Causes:
-
Wall collisions during hammer or cage movement
-
Insufficient casing depth causing vibration-induced collapse
-
Inadequate mud addition/maintenance
-
Improper drilling speed in specific strata
Solutions:
-
Maintain the vertical movement of equipment
-
Optimize casing depth based on geology
-
Continuously replenish the drilling fluid
-
Adjust mud density and drilling speed by stratum
-
For severe collapse, add quality clay before low-speed drilling
Issue: Pile Deviation
Causes:
-
Unstable equipment or loose components
-
Improper equipment support
-
Obstructions or uneven strata resistance
Solutions:
-
Proper equipment leveling and calibration
-
Vary the impact height according to strata
-
For severe deviation: add stone-clay mixture and re-drill
Issue: Drilling Stagnation
Causes:
-
Hammer clogging with clay
-
Poor cutting removal
Solutions:
-
Enhance cutting removal
-
Reduce mud density or increase hammer weight
-
Clean clogged hammers before resuming
Issue: Reinforcement Cage Issues
Causes:
-
Excessive length without proper bracing
-
Missing alignment rings
-
Existing hole deviation
-
Improper installation angle
-
Residual sediments
Solutions:
-
Sectional fabrication and installation
-
Install alignment rings at intervals
-
Correct the hole deviation before installation
-
Ensure vertical, slow placement
-
Complete sediment removal
Issue: Defective Pile Base
Causes:
-
Insufficient mud density post-cleaning
-
Incomplete hole cleaning
-
Wall damage during equipment handling
Solutions:
-
Immediate concrete pouring after cleaning
-
Maintain proper mud density and water levels
-
Protect whole walls from impacts
-
Verify sediment thickness before pouring
Conclusion
This comprehensive bored pile construction process ensures foundation quality through meticulous attention to each operational phase. Proper execution of these steps, combined with proactive problem prevention and resolution, results in structurally sound pile foundations that meet all engineering requirements. Construction teams should strictly adhere to this protocol while adapting to specific site conditions for optimal results.
