
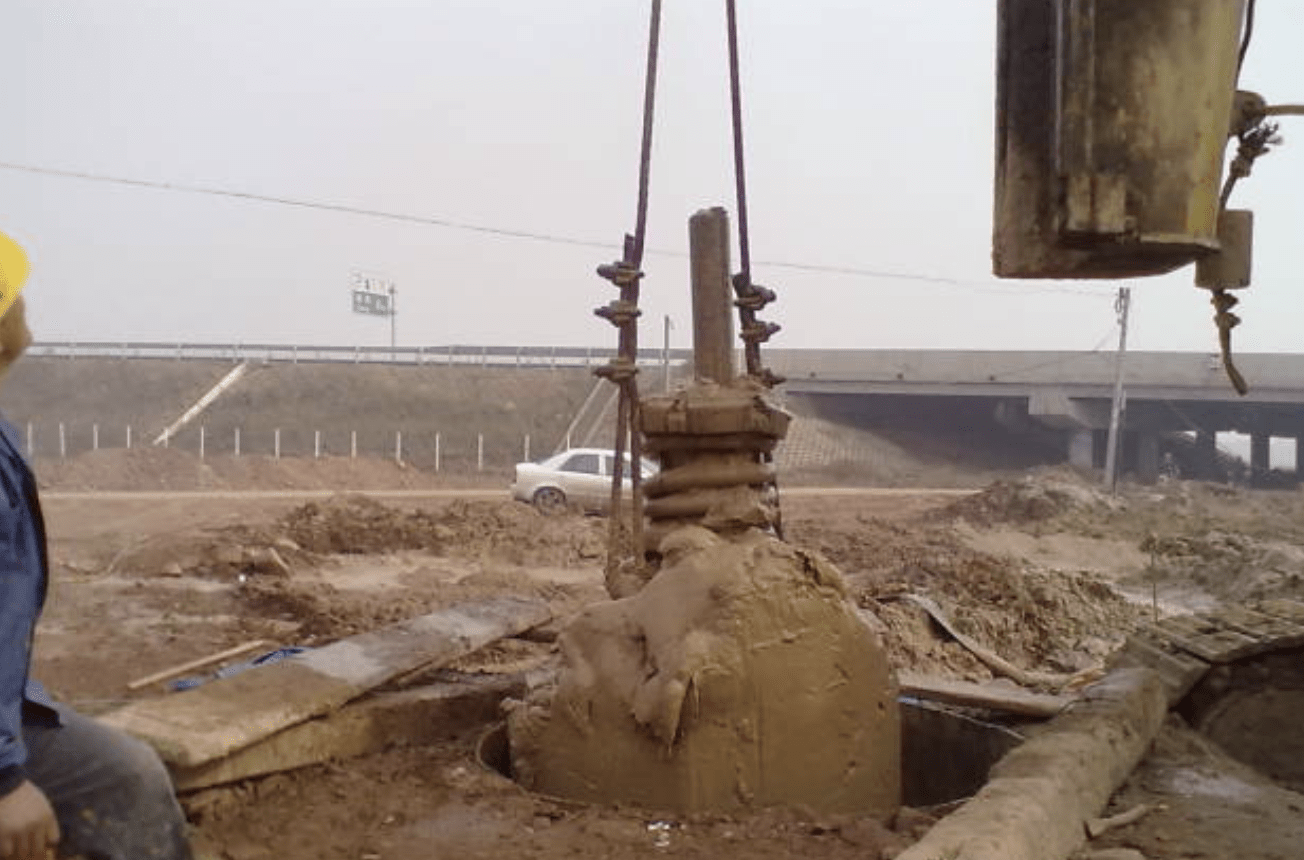
Pile Excavation and Preparation
Engineering Piles
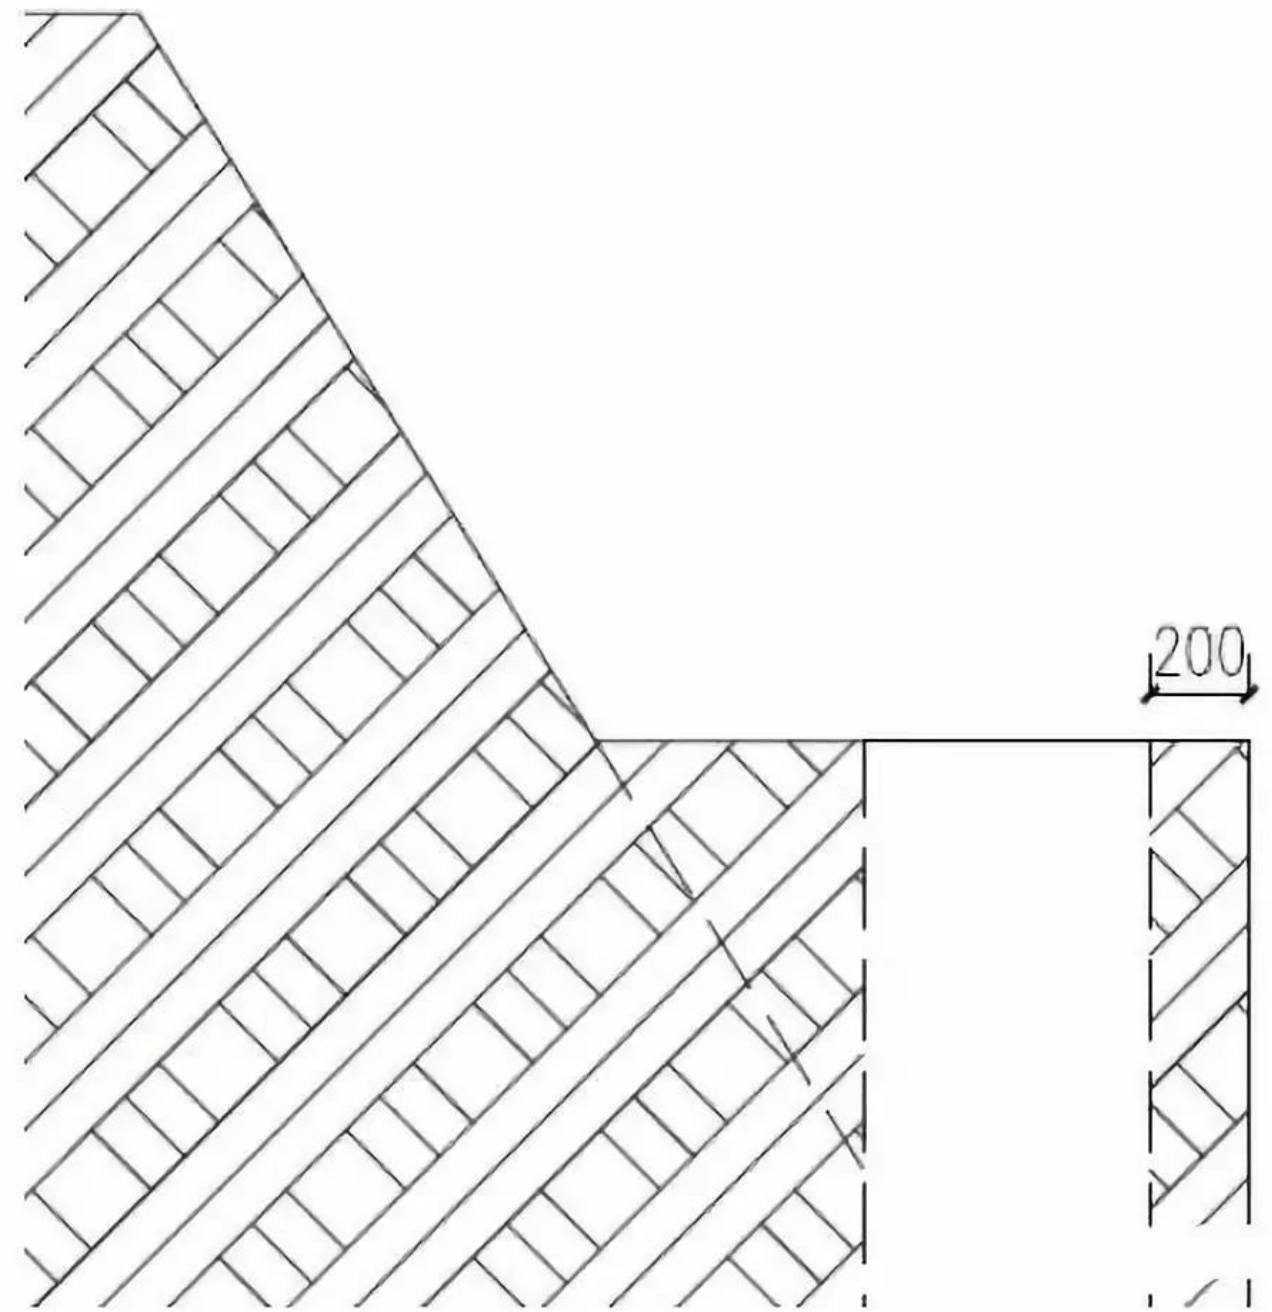
Mechanical excavation is used to reach the designed elevation, ensuring equipment does not contact the pile body. A 200mm perimeter around the pile is manually cleared.
Support Piles
Due to dense spacing (A1000@1200) and proximity to slopes, mechanical excavation stops 200mm from the pile, with the remaining soil manually removed and inter-pile debris cleared.
Construction Process
1. Workflow
-
Upper concrete removal → Elevation measurement & marking → Cutting protective piles → Opening a gap → Exposing rebar → Deepening the gap → Drilling to fracture → Lifting the broken section → Residual chiseling → Cleaning the pile head
2. Technical Requirements
-
Survey Marking: Before pile head removal, surveyors mark the designed elevation for each pile.
-
Reinforcement Protection: A 10cm buffer above the pile top is reserved for final manual chiseling to ensure accurate embedment into the cap.
-
Post-Fracture Inspection: After lifting, check for flatness; uneven surfaces are corrected with steel chisels.
-
Sonic Tube Protection: For piles with sonic tubes (arranged at 120° inside main bars), avoid damage during chiseling. If tubes protrude excessively, cut and seal with cloth to prevent clogging.
-
Anchorage Adjustment: If the cap/beam height is less than the rebar anchorage length, bars may be bent at the top to meet requirements.
3. Construction Steps
A. Engineering Piles
-
Elevation Marking: Set a 100mm reserve zone above the cap embedment line.
-
Precision Cutting: Use a saw to make two shallow cuts (depth < 60mm cover) without damaging rebar.
-
Manual Chiseling: Create a gap at the upper cut line, then peel back the concrete cover and bend the rebar outward.
-
Fracturing: Drill upward at 100mm above the pile top, then lift the fractured head.
-
Finishing: Manually remove reserve concrete, clean debris, adjust rebar, and seal sonic tubes with plugs.
-
Testing & Approval: Conduct low-strain tests post-chiseling, clean the pit, and pour leveling concrete after inspection.
B. Support Piles
-
Slope-Side Caution: Work from one side due to narrow spacing; monitor slope stability.
-
Controlled Demolition: Cut from the soil-free side, gradually breaking concrete near slopes to avoid rebar damage.
-
Final Steps: Remove debris, adjust rebar, and proceed to leveling after sonic tube protection.
C. Abandoned Piles
-
Rebar Extraction: Expose and cut bars at the marked elevation.
-
Mechanical Fracturing: Drill perimeter holes, insert steel wedges, and use excavators to snap the pile for removal.
Pile Head Defects & Remedies
Common Defects
-
Insufficient Rebar Anchorage: Broken/short protruding bars.
-
Concrete Issues: Mud inclusion or low strength.
-
Cover Deficiency: Exposed rebar.
Remedial Measures
1. Rebar Anchorage Failure
-
Solution: Double-sided lap welding (min. 5d length) after cleaning and chiseling to expose intact bars.
2. Inadequate Cover/Exposed Rebar
-
Solution: Excavate around the pile (20cm wider, 10–15cm deeper), clean surfaces, and pour C35 concrete.
3. Mud Inclusion/Weak Concrete
-
Solution: Remove contaminated concrete until a fresh layer (10–15cm below the defect), backfill, compact, and recast with C35.

Safety Protocols
-
PPE: Hard hats and insulated gear for equipment operators.
-
Pre-Work Checks: Inspect tools, electrical safety, and air compressor settings.
-
Hazard Control: Bar (alcohol), unauthorized removal of safety signs, or forced pile fracturing with excavators.
-
Supervision: Dedicated spotters during lifting and chiseling to prevent accidents.
This procedure ensures compliance with design standards while prioritizing structural integrity and site safety. Regular inspections and methodical execution minimize defects, facilitating seamless progression to superstructure construction.
